A Beginner’s Guide to fishing the Waggler
Waggler fishing is an ideal method for beginners and often the go-to technique for many seasoned anglers. Join Chris Smith as he takes us through his guide to Waggler fishing.
For me, the first rod to come out of the bag is a waggler rod, everytime! On commercials I will always set up my waggler before my pole because I enjoy rod and line fishing first and foremost. It is especially true on a river where my two matching ready-made-up 13’ rods come out of the same bag first, one for stick and one for waggler.
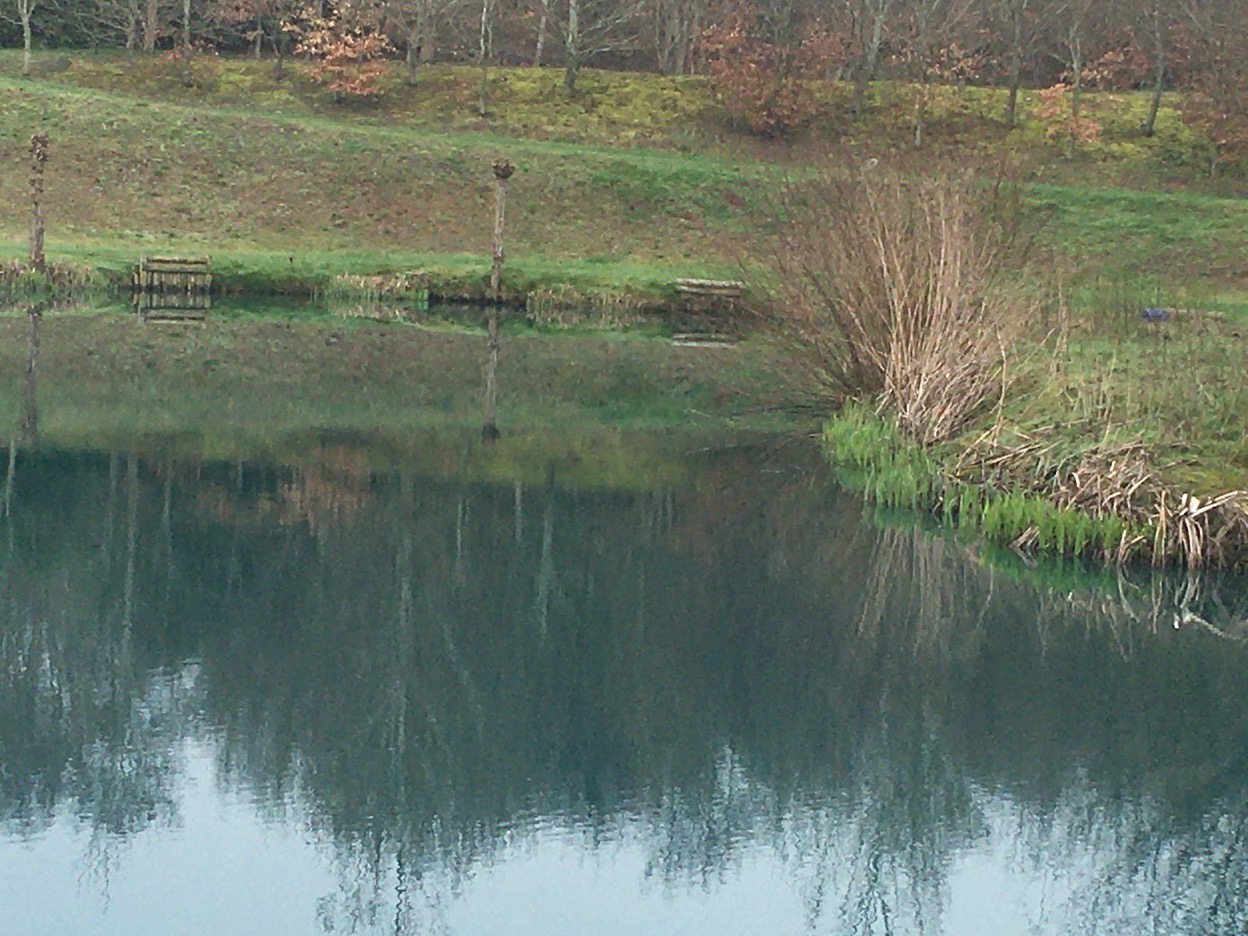
Just imagine rocking up to a peg like this. All that open water begging to be explored. The wind is calm, that island is only twenty metres away, and if you listen to the voices in your head they will be saying .. “Go on! Get your waggler out.” Why wouldn’t you?
So, you can see that I am a dyed-in-the-wool waggler angler and have probably done more waggler fishing than all other methods added together (which is a surprising thing to say when I must acknowledge that fishing a stick float is my absolute favourite method of all!)
So it is with a heavy heart that I now recognise that waggler fishing is a dying art. Unbelievably to me there are anglers out there, both young and old alike, who simply never set up a waggler rod. The pole has made fishing so simplified that many anglers will go for the relatively straightforward, tangle free, ‘let the elastic play the fish’ method every time … which is a great shame.
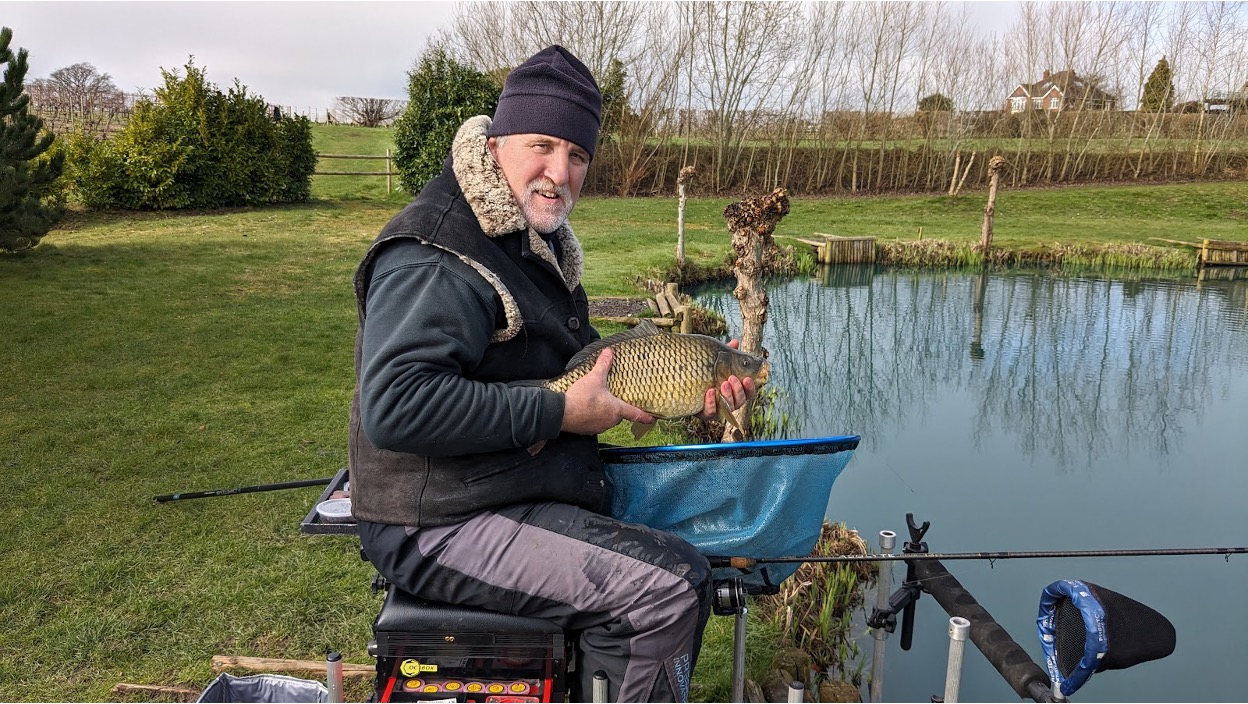
No more than twenty maggots catapulted tight up to the far island and this lovely waggler caught carp was the result of my very first cast.
Under many circumstances a competent waggler angler will double the catch rate of a pole angler. The only thing that will possibly beat a waggler is a long line whip/pole where the fish can be swung to hand.
A waggler approach has many advantages on small fish venues like some fenland drains, on rivers and even on canals. There are fish on the far bank that the pole will not even reach, and even if they can be reached by a pole the waggler angler can often sort them out faster.
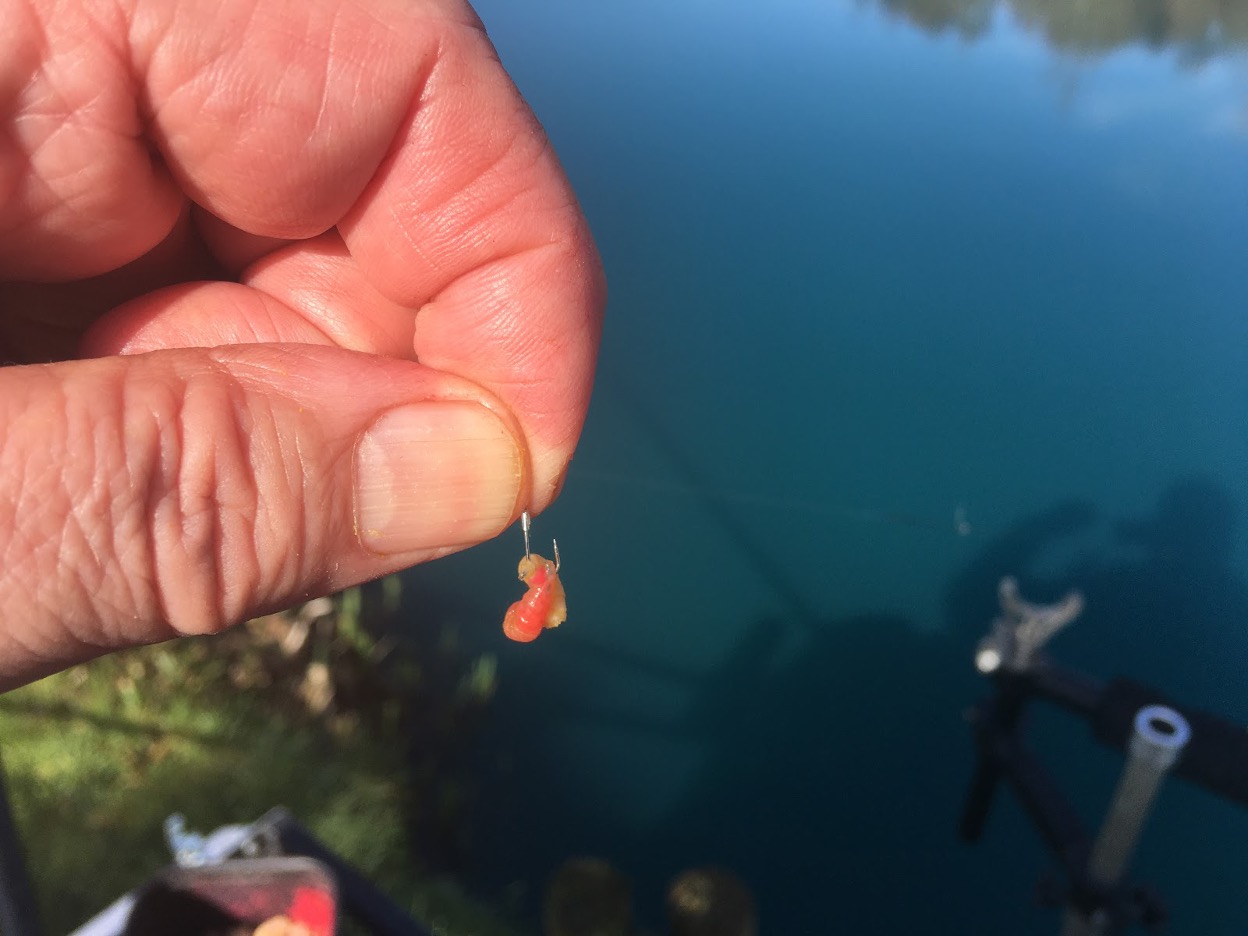
Two maggots on a fine wire size 18 hook. All the attraction required to catch anything that swims. Perfect bait on a waggler.
Canals, especially busy canals, are a challenge for many pole anglers because trying to quickly throw a long pole behind you across a tow path is no joke with dog walkers and cyclists all vying for priority. A waggler can be an especially useful tool on both busy and extra wide canals.
So, … like with all dying arts it is behoven on ‘old sweats’, like me, to do their utmost to protect the skills and pass them on in an easy to understand way. My intention is to explain and simplify the basics about waggler fishing and I hope this article whets your appetite, fills in a few of the blanks for you regarding waggler fishing, and if I can inspire just one of you to fall in love with the method I will be a happy man. Read on and enjoy.
What is a waggler?
Simple, …. a waggler is any float that is attached bottom end only and can articulate freely. If it hangs off your line with a fixing point on one end only, and it waggles about as you use it, then it’s a waggler. For the purposes of this article I am going to concentrate my efforts upon the type of float you will be able to use for 99% of your commercial and stillwater fishing … the insert waggler.
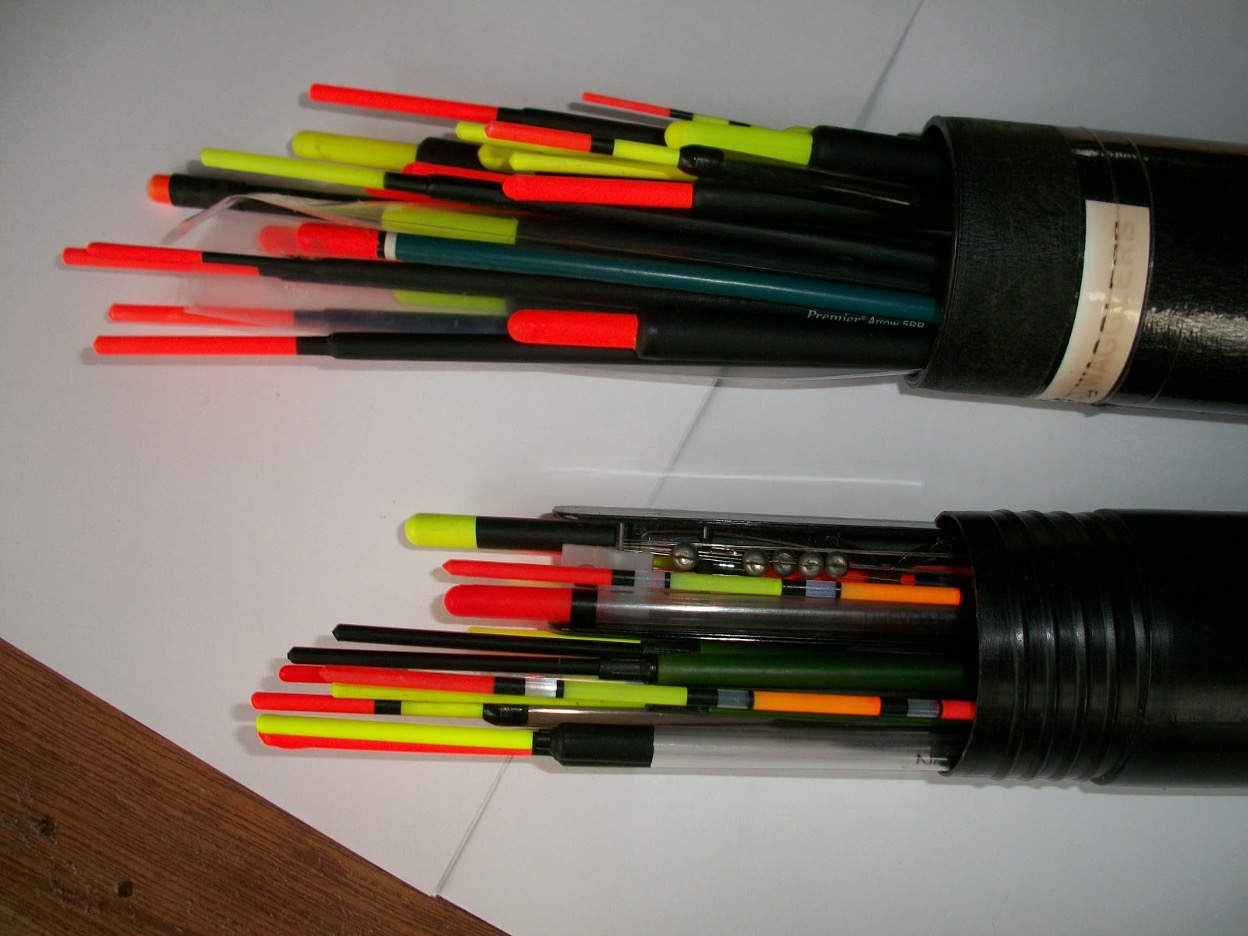
One tube full of loaded wagglers and one full of unloaded. I have another tube full of canal wagglers and yet more with sliders and big floats. You can never have too many floats, can you?
A few physics lessons.
Forgive me if you know all this already but I recognise that there may be young anglers out there who really don’t understand the fundamentals of how a waggler float, and indeed all floats in general, work. I have seen many anglers over the years who demonstrate a lack of understanding when it comes to shotting their floats. With ensuing tangles that cause great frustration and an inability to reach their target, it’s no wonder that youngsters stick to the pole.
Others will have so much float sticking out of the water that they have very little chance of ever seeing bites. So, with the title of this article ringing in my ears I would like to explain some of the basics to the beginners out there.
Float fishing: Rule no 1.
Use the thinnest line you can get away with. A thin line, with a lower breaking strain, is far more supple and will peel off the spool without retaining its shape. This means it will cast more easily, and therefore further, than a heavy line. It’s a very easy mistake for young or inexperienced anglers to think that, because they are hoping to target double figure fish, they must use a 15 – 20 lb reel line to catch them with. For those who have never had the benefit of any kind of formal instruction, why wouldn’t you use a heavy line to attack a carp fishery with dreams of monsters?
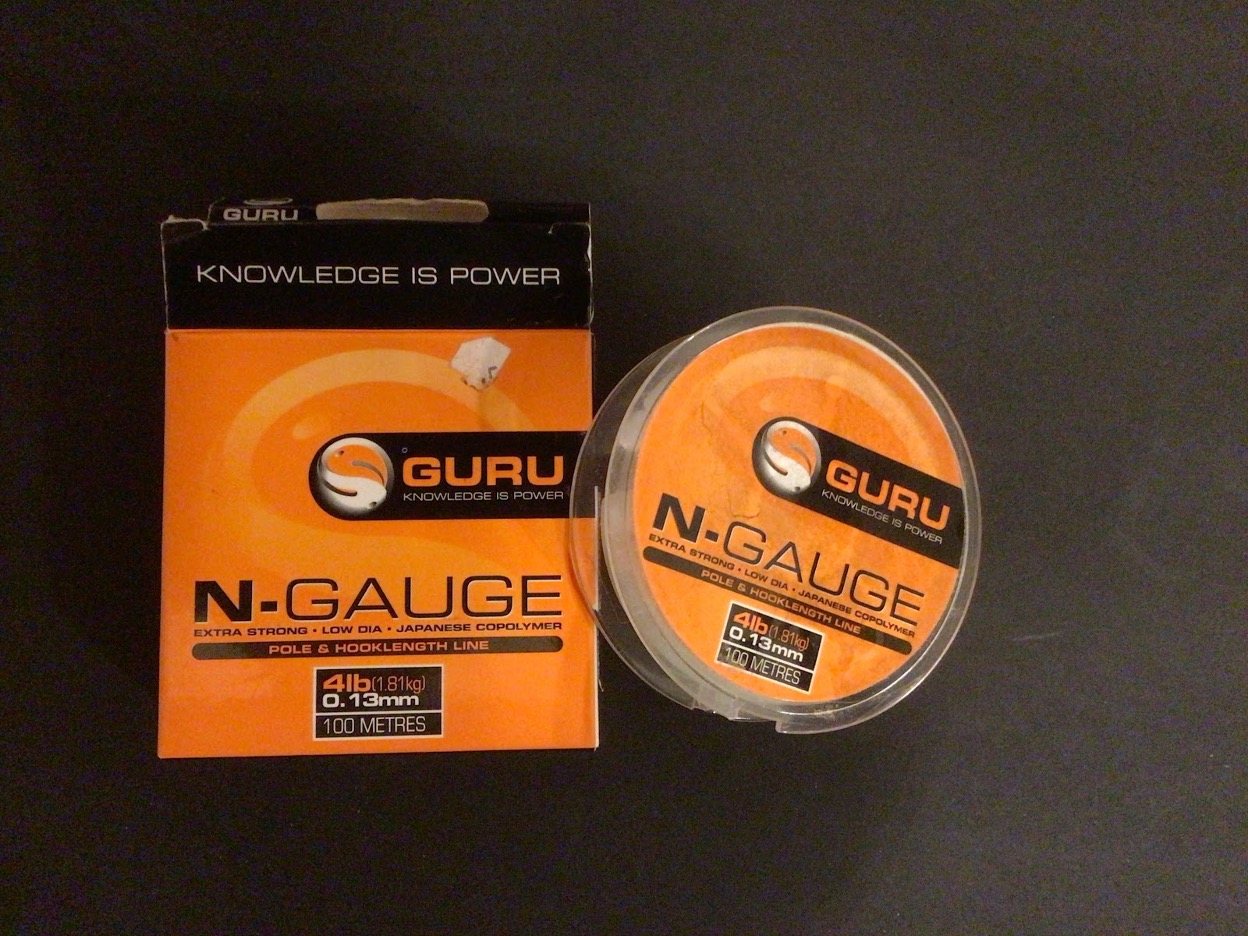
A perfect thickness of line for winter waggler fishing. You can use any make of line you want because, despite what the adverts and sponsored anglers will tell you, the difference in performance between lines of exactly the same thickness is so negligible that it’s never going to become an issue. If you find a line that you like, stick to it.
If you fancy waggler fishing on a commercial venue and have doubts about line selection, my suggestion is to use nothing bigger than a six pound line in summer and you can easily get away with a four pound line in winter. These lighter lines give the benefits on the cast, readily peeling off the reel and passing easily through the guides yet are still strong enough. For those in doubt just try to break six pound line with your hands, you will be surprised by how difficult it is. Be careful, though, we don’t want anyone cutting themselves. If you take your time, when playing a fish, and you are smooth and steady, you can land anything that swims with a six pound reel line.
Float fishing: Rule no 2
Very basically, the more float sticking out of the water, the less fish you will hook. Although there are more factors to consider than this simplistic statement, for our purposes you can consider that a fish can only feel the part of the float that is sticking out of the water. A biting fish, wishing to swim off with its prize, will need to overcome more ‘pull’ to move the float down the more of it that is above the surface.
It follows that any fish that is wary about taking a bait is far more likely to feel that extra resistance and quickly spit out the bait. By shotting a float correctly and leaving as little as possible exposed, an angler increases the frequency and likelihood that the fish will take the bait confidently. The simple fact is, having as little float as possible showing above the surface will increase your catch rate.
There are exceptions to rule no 2. Sometimes the resistance of the float can be used to cause fish to self-hook, a little like a bolt rig in carp fishing. A pellet waggler often works this way because the carp, competing for feed, will just race about snatching at the free offerings and inadvertently take the hookbait too. We all know there are days when the fish will compete and they will take any bait we throw at them without a second thought. Although I do enjoy the pellet waggler I can quickly get bored if the carp are hitting everything and just hooking themselves. I call it ‘duffers day’ when it happens and I thank the lord that days like that don’t come along too often, it’s called fishing not catching!
Float fishing: Rule no 3
Every shot placed on the line must have a purpose. We can define all running-line floats as devices that usually only deliver two functions. They provide sufficient weight to be able to cast to your chosen spot and then they becomes an indicator to let the angler know when a fish has taken the bait.
An easy way to shot a waggler float is to simplify the process in your mind and apply just two distinct groups of weight. This very simplified view will work everytime but, with practice, the dividing line between the two groups will be blurred. Worry not, by the time you work that one out you will be thinking for yourself and you won’t need my help.
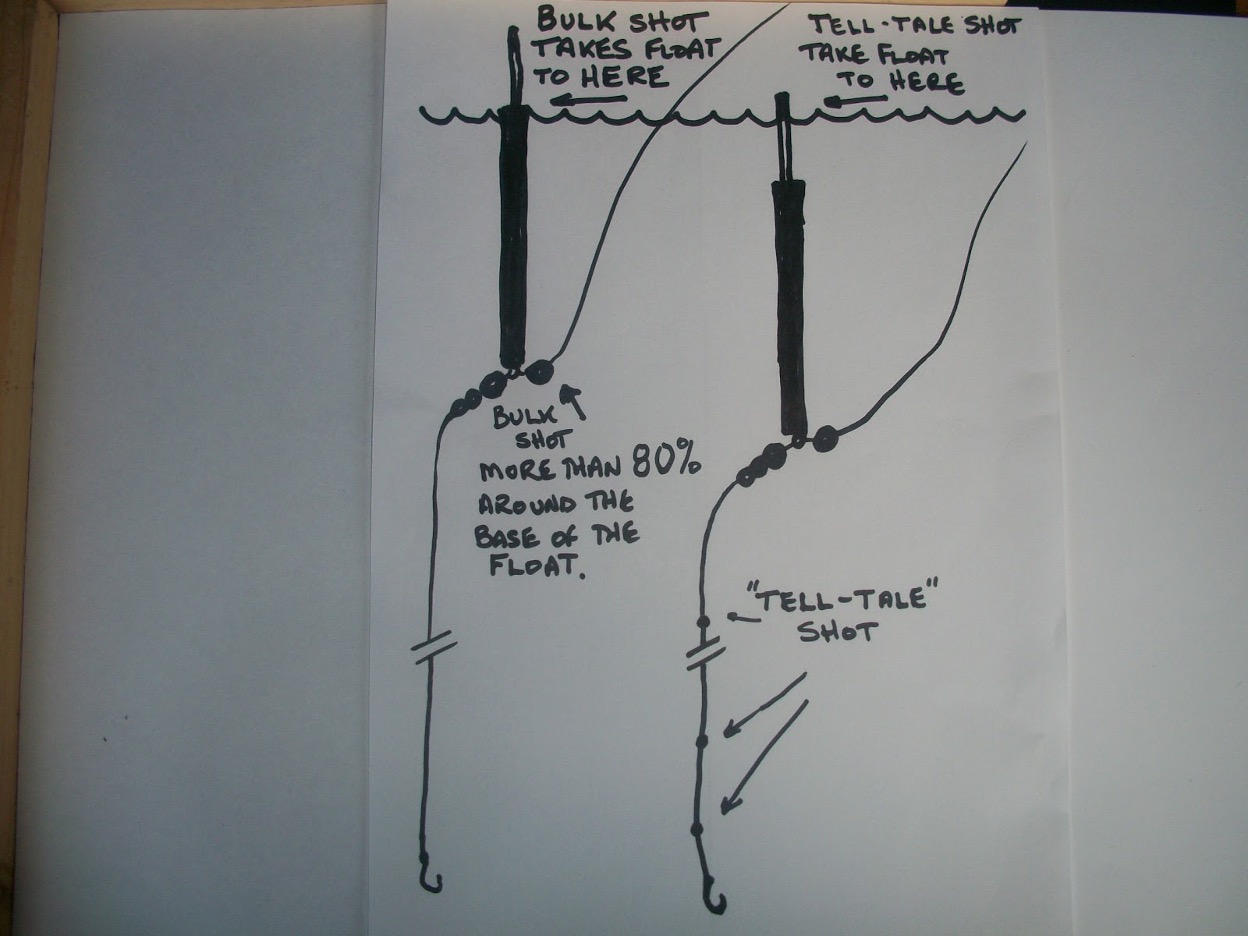
An insert waggler should be weighted with virtually all of the shot around the base of the float. Although I indicate ‘more than 80%’ should be placed around the float I would usually place more than 90% as bulk. It is vital that the tell-tale shot each have a discernible effect on the tip. The angler should see each tell-tale register on the tip and once the pattern of the fall of shot is recognised then they will be able to know immediately if a fish has intercepted the bait n the drop.
The first group of shot, or the ‘bulk’ as it is often known, should be placed around the base of the float. The bulk should be sufficient to cast the distance required, but if it isn’t, just use a bigger float. Try to make your bulk simple and neat with matching large shot either side of the float. Generally a few larger weights will be used as the bulk. The bulk should roughly be sufficient to sink the float right down until virtually all of the main body is below the surface and only the insert is above the surface.
The second group of shots on an insert waggler is made up of smaller weights spread out below the float and these comprise the ‘dropper’ shots or ‘tell-tale’ shots. These are often three very small shots, spread out along the line just above the hook. Sometimes two or even only one dropper shot will suffice but don’t think simplifying your droppers into just one shot makes it quicker and easier for yourself. I would ALWAYS use at least three separate droppers that give me the option to push them together or spread them apart. In truth, I will often apply six small shot which allows me to push shot together or pull them apart again until I get the desired effect of seeing every shot (or double shot) register. Any tell tale shot not required for bite registration can just be pushed back up under the float to become part of the bulk.
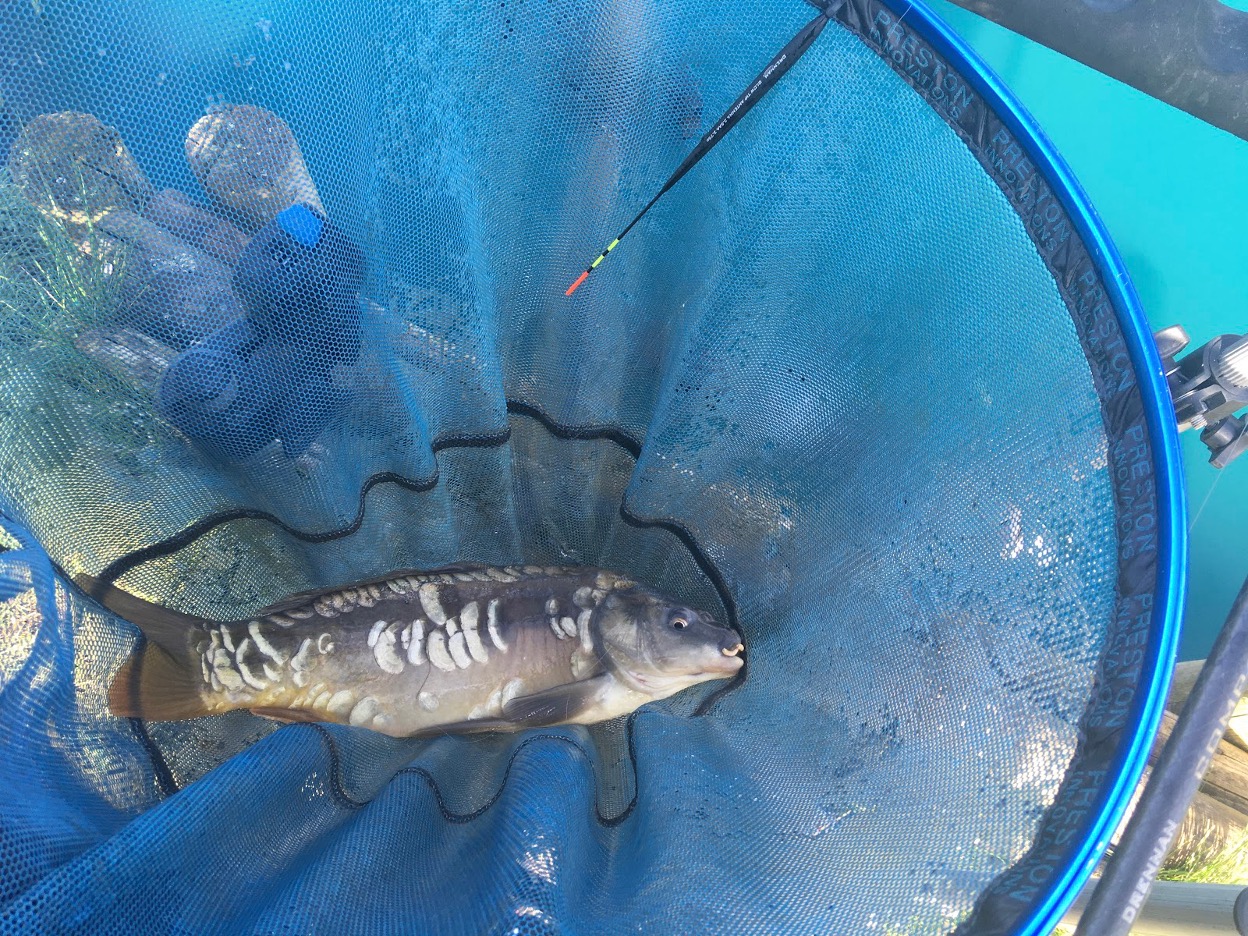
They don’t have to be big to be fun. My main target on the insert waggler is normally smaller silvers, hopefully caught in greater numbers, but when the odd carp comes along it is always a pleasure.
The end result should be that, after the bulk has taken the main body of the float down, each tell-tale then sinks the float by an additional amount that is visible to the angler. The angler must also ensure that, once the float has fully settled, there remains just enough float sticking out of the water for the angler to still see the float at distance.
The last bit of the float that doesn’t actually settle below the surface i.e. the tip of the insert, is the bite indicator. As the tell-tales settle the angler should be able to see the effect that each one has on the float. If a fish can pick up your hookbait, and swim away taking a tell-tale shot with it, without causing a discernible movement on the float, then the shot is clearly of the wrong size or in the wrong position. Moving your tell-tale towards the hook can make registration more positive, as can moving two tell-tale shot together. This is why it is preferable to have three or more small shot that the angler can move about to alter presentation rather than a single shot which gives less flexibility.
Types of waggler
There are many types of waggler. Straight, insert, bodied, antenna, truncheon floats are all available both as loaded and unloaded versions. As stated above I am going to concentrate on the straight insert versions as they are by far the most useful on a modern commercial still water.
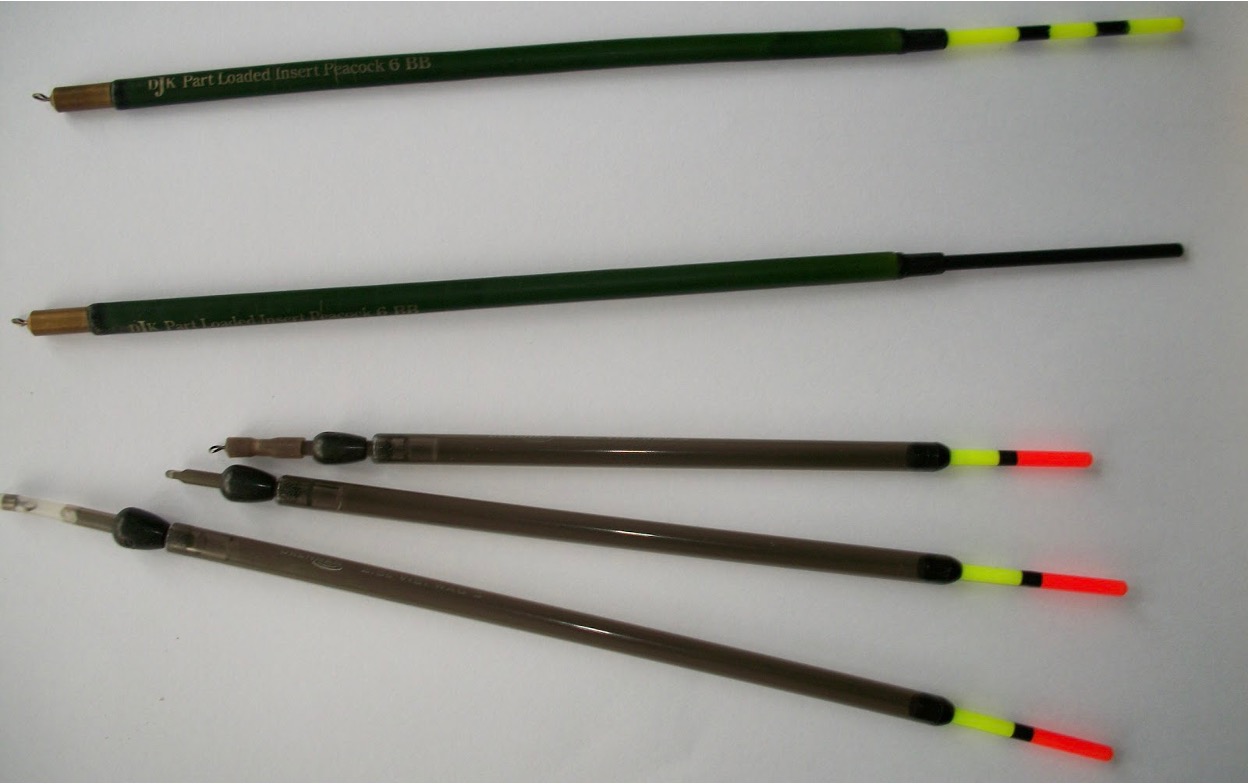
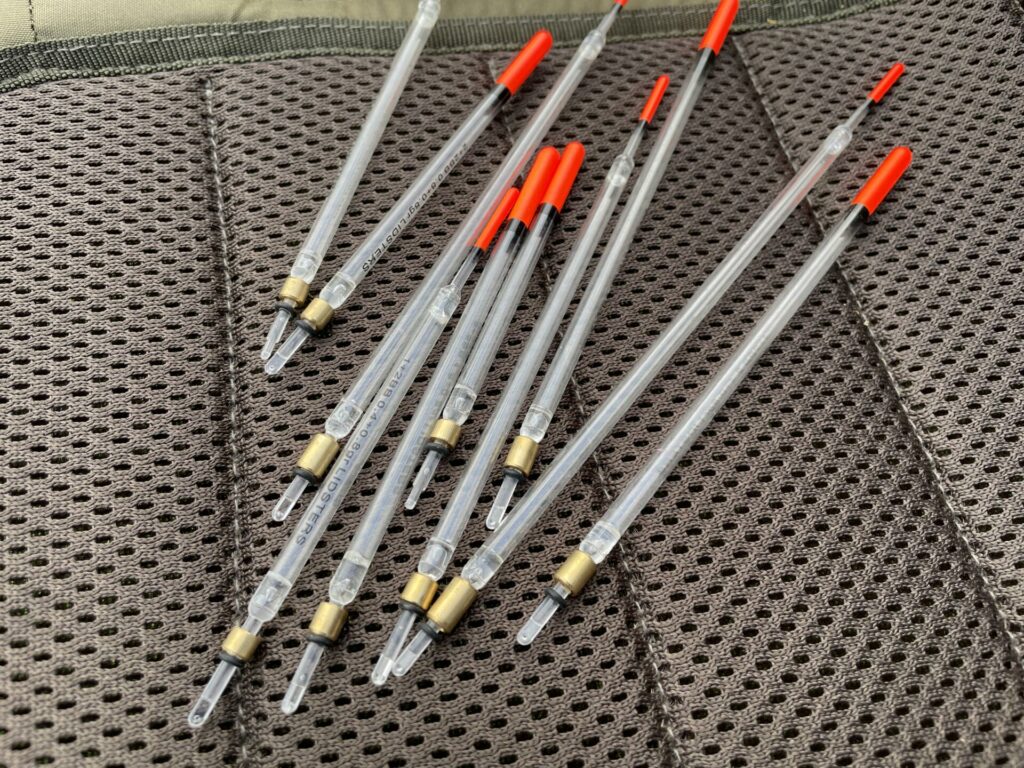
All the floats in this photo are different sizes of loaded waggler. All are of the ‘insert’ waggler type, perfect for commercial fishing, as can be seen by the thinner tips. All are of the type with fixed loading, i.e. there is just a single weight affixed to the float. This type of waggler does not allow the angler to adjust the amount of load, which means they lack some of the flexibility to cope with variable conditions. For catching fish ‘on the drop’ they are perfect.
Waggler fishing on commercial waters
Most anglers these days will be stalwart and regular visitors to one or more of the hundreds of commercial fisheries available, and will only ever fish managed stillwaters. For these extremely popular venues you only really ever need two types of waggler float, the pellet waggler and the insert waggler.
The insert waggler is designed with the majority of the body being ‘fatter’ than tip. This extra size in the main body is to allow the float to support more casting weight, enabling the float to reach a reasonable distance out. The sight tip, which is ‘inserted’ (giving the float its name) into the main body is a thinner piece of what can often be a less buoyant material, that is there primarily to provide bite indication. Often the thickness of the tip has more to do with being fat enough to be seen, yet thin enough (or heavy enough) to have little buoyancy. The tip is often brightly coloured enabling it to be seen at distance though a black tip shows up best against water that is reflecting the sky.
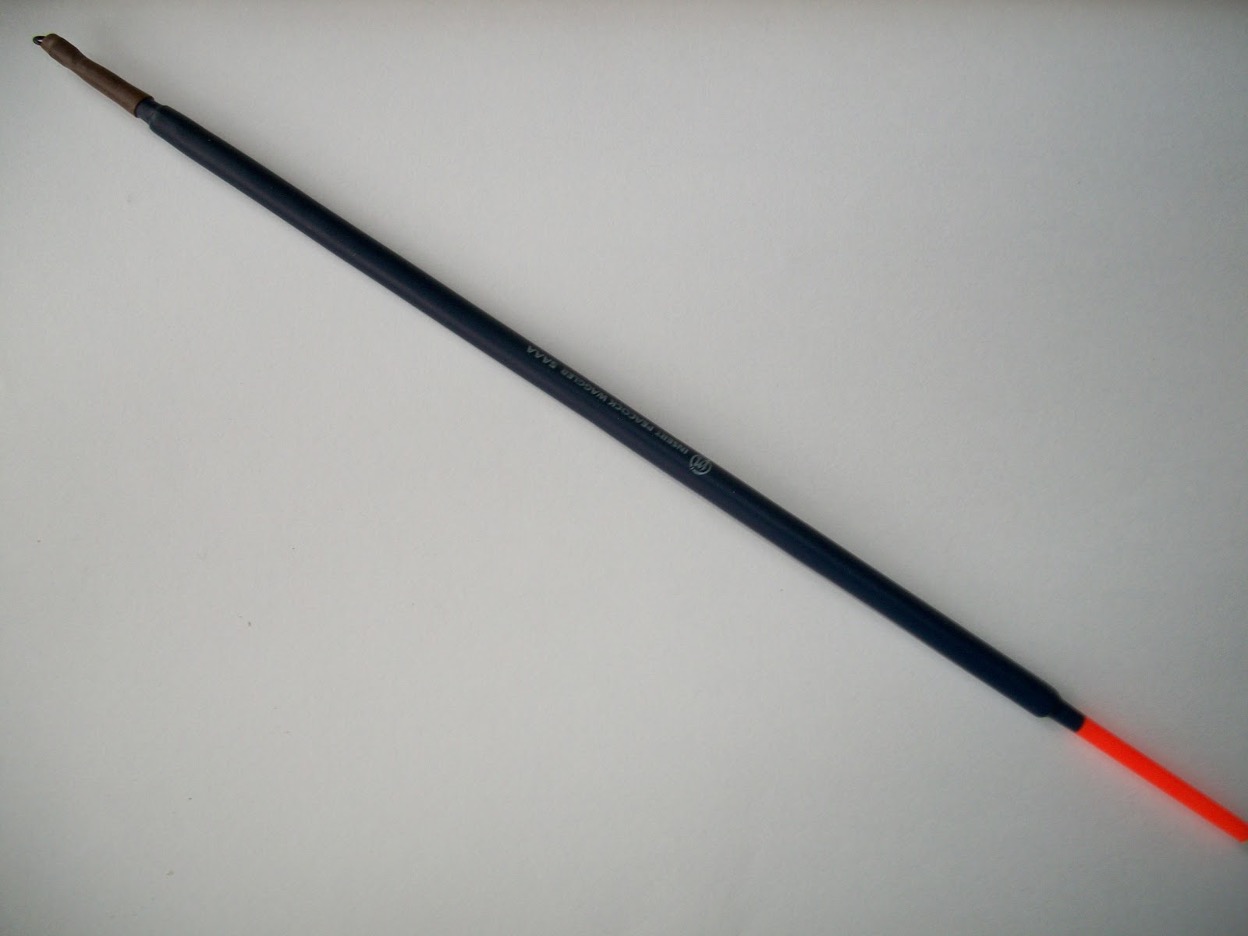
This is an unloaded peacock insert waggler. ‘Unloaded’ because it is not weighted at one end, it is made of peacock quill, which is the tail feathers from an actual real life peacock, and the thin tip (or insert) is a thinner piece of peacock inserted and glued into one end. Peacock is a wonderful material for making floats. It is nicely buoyant but robust enough for the job and I am not alone in thinking that peacock quill makes the best waggler floats of any material.
Of course referring to the tips as being ‘inserted’ is often a misnomer these days, harping back to the original peacock quill or reed floats that really did have thinner pieces inserted and glued in place. Modern wagglers are very often plastic throughout and no glue is used at all, though peacock is still remains a much sought after material for making floats, even these days.
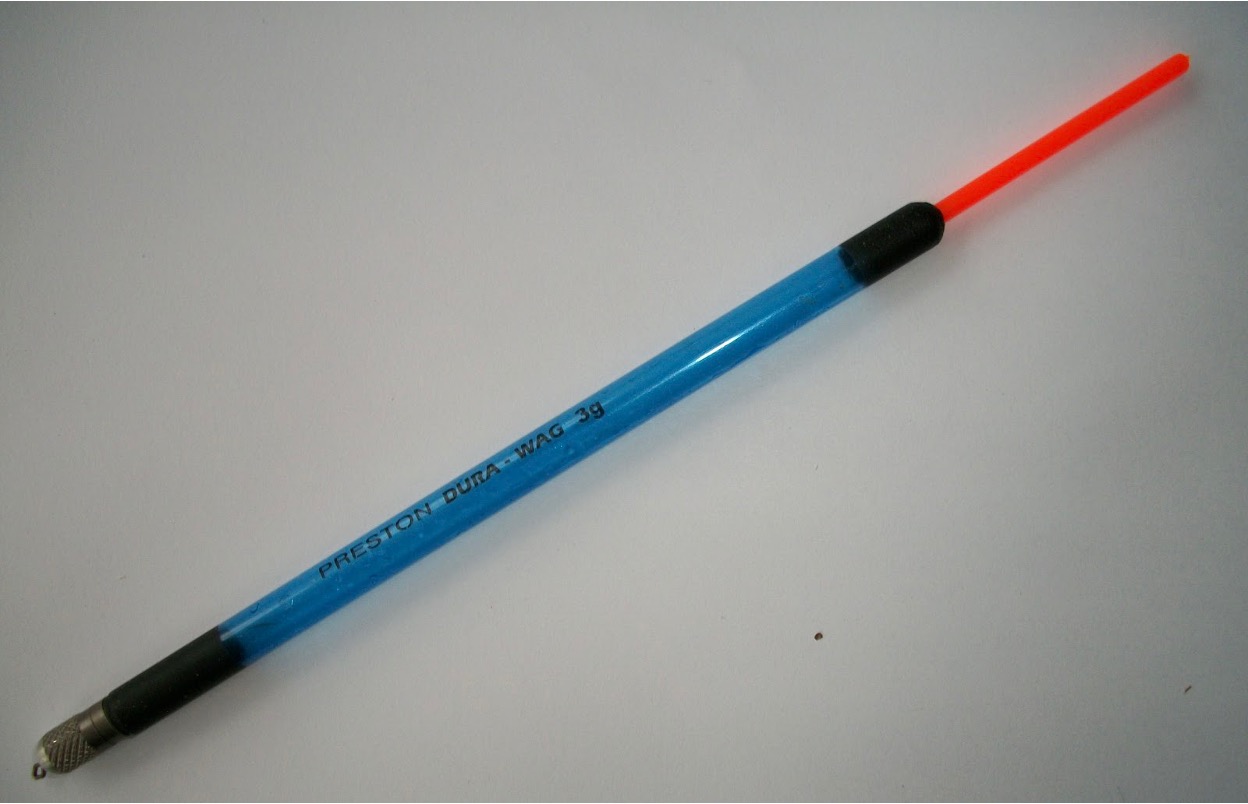
This ‘insert’ waggler is made entirely from plastic with a metal weighted base. It is made by Preston Innovations and is called a ‘Dura Wag’. Unfortunately, despite being sold as a ‘durable waggler’ I recently found this one to be taking in water – yet I cannot identify where it is leaking. This is not just a problem for Preston, I have found that every make of plastic waggler I have purchased has rogue floats that take on water. I have quite few Drennan Visi-wags that I purchased in sets and these too have problems. I come back to my recommendation that peacock wagglers make the most reliable floats and that the new fangled plastic floats are often a bit ‘suss’.
Selecting the right waggler, what size should I use?
This is another relatively simple to answer question. Although there are multiple scenarios where you might deviate from this rule, my advice is to select a float that is easily heavy enough to reach the distance you want to cast to. Under normal circumstances you should not cast any float further than you can catapult the bait you are using, and that is approximately 20 – 30 yards(metres) when using maggots.

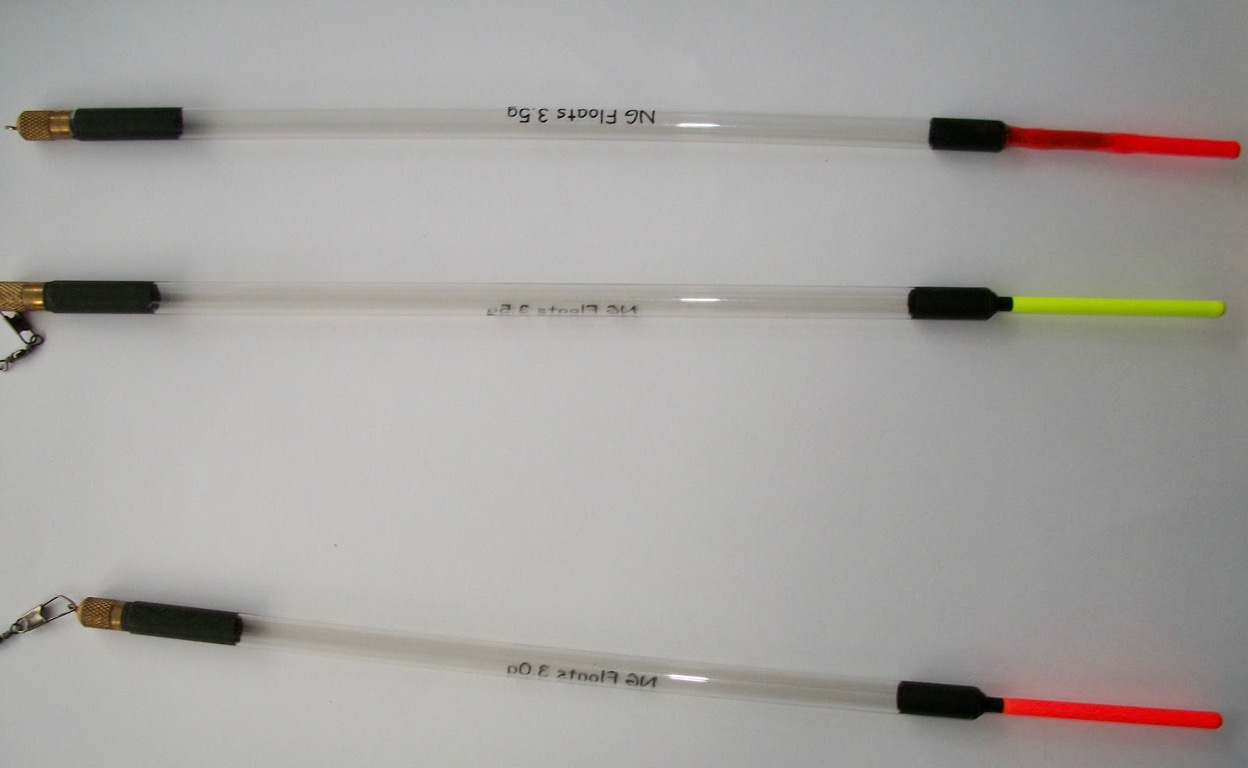
This loaded waggler carries 3.5g of loading and casts like a missile. I have similar floats up to 5gm and they will cast far enough for them to become difficult to see. I need plenty of float sticking out of the water to enable my old eyes to discern a bite at long distance and these hollow plastic sight tips, which will virtually glow in sunlight, are a great advantage.
This ‘achievable’ distance, of course, depends upon other factors, such as the bait, the catapult being used, and also the wind conditions on the day. Generally speaking though, a float taking 3.5 gm or 5 AAA will easily do the trick. You may select slightly lighter floats for the job but, as stated earlier, I always try to use a float that can EASILY reach my target. I have, on many occasions, used a 4 gm float and cast even further, and this will be because I am using sweetcorn or 8mm pellets which will catapult to greater distances. Finally when using even bigger 11mm pellets I have used six, eight or even ten gram pellet waggler floats to reach well past thirty metres. Finally, it is possible to catapult balls of groundbait fifty metres or more so you may well use a very big 10gm+ float to reach that kind of distance.
Waggler fishing on commercial waters
Most anglers these days will be stalwart and regular visitors to one or more of the hundreds of commercial fisheries available, and will only ever fish managed stillwaters. For these extremely popular venues you only really ever need two types of waggler float, the pellet waggler and the insert waggler.
The insert waggler is designed with the majority of the body being ‘fatter’ than tip. This extra size in the main body is to allow the float to support more casting weight, enabling the float to reach a reasonable distance out. The sight tip, which is ‘inserted’ (giving the float its name) into the main body is a thinner piece of what can often be a less buoyant material, that is there primarily to provide bite indication. Often the thickness of the tip has more to do with being fat enough to be seen, yet thin enough (or heavy enough) to have little buoyancy. The tip is often brightly coloured enabling it to be seen at distance though a black tip shows up best against water that is reflecting the sky.
Of course referring to the tips as being ‘inserted’ is often a misnomer these days, harping back to the original peacock quill or reed floats that really did have thinner pieces inserted and glued in place. Modern wagglers are very often plastic throughout and no glue is used at all, though peacock is still remains a much sought after material for making floats, even these days.
Selecting the right waggler, what size should I use?
This is another relatively simple to answer question. Although there are multiple scenarios where you might deviate from this rule, my advice is to select a float that is easily heavy enough to reach the distance you want to cast to. Under normal circumstances you should not cast any float further than you can catapult the bait you are using, and that is approximately 20 – 30 yards(metres) when using maggots.
This ‘achievable’ distance, of course, depends upon other factors, such as the bait, the catapult being used, and also the wind conditions on the day. Generally speaking though, a float taking 3.5 gm or 5 AAA will easily do the trick. You may select slightly lighter floats for the job but, as stated earlier, I always try to use a float that can EASILY reach my target. I have, on many occasions, used a 4 gm float and cast even further, and this will be because I am using sweetcorn or 8mm pellets which will catapult to greater distances. Finally when using even bigger 11mm pellets I have used six, eight or even ten gram pellet waggler floats to reach well past thirty metres. Finally, it is possible to catapult balls of groundbait fifty metres or more so you may well use a very big 10gm+ float to reach that kind of distance.
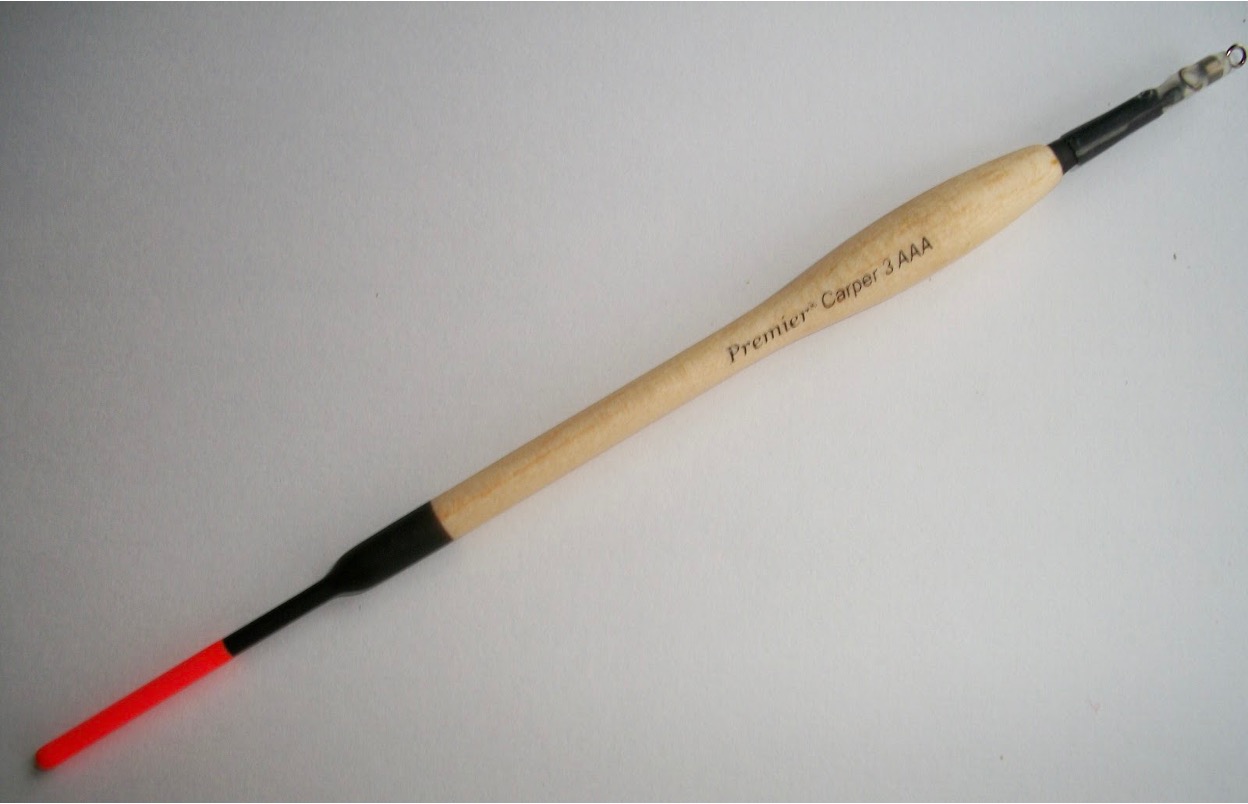
This is a relatively small float that is also not too heavy. Perfect for a short ‘chuck’ under bankside vegetation where the thin tip can be shotted right down to give excellent bite registration. Ignore the word ‘carper’ on the side, this float can catch gudgeon from a canal if set up correctly.
Remember that it is not mandatory to throw your waggler float a long way, indeed there are many times when just off your rod tip will do. If you are dropping your float off the end of your rod tip you can get away with using the lightest float you can find. However, if you change your tactics halfway through fishing and decide you are going to try to cast that same light float out twenty metres towards an island, then you will not be able to do so. There is simply not enough weight attached to the float to carry it that distance. A float that fishes the far bank can also be successfully used at your feet, but the opposite is not true.
Use a bigger float
One of my own personal rules is that I will invariably use a slightly heavier float than I think I will need. A heavier float gives me control because I know, if needed, that I can cast it much further than I have to. Once I know I can easily reach the required distance I also know I can therefore feather my line on the cast and, using the exceptional skills that I have developed over the years, I can stop the float perfectly every time, dropping in as close as possible to the far bank. Ha ha ha… if you believe that you will believe anything. I stick it in the brambles just like anyone else, though I do hope that I don’t do it that often.
In summary, if you use a slightly heavier float than is needed, it puts YOU in control. Should the wind veer, and begin to blow across you, or worst of all, into your face, you may still have enough casting weight to cut through, allowing you to keep your casting straight and accurate, and continue to catch from that pocket of fish that are sitting under the far-bank vegetation.
Control on the cast
Over the years I have seen (and heard) many anglers around me whose rods make ‘whooshing’ noise on the cast. Very often they mutter expletives under their breath, wind back in immediately, and have another throw. This ritual, to my mind, is very likely because their chosen floats are too light and their technique to overcome this is to apply brute force.
Winding up to give the maximum rod speed when casting is a recipe for inaccuracy and frustration. Yes, I agree, with a perfect cast, and no wind to contend with, most anglers can just about reach their target by putting in an almighty effort. Whoosh! But these anglers are not in control, they are at the whim of the elements and will get frustrated very quickly. Your float can steer itself in strange directions, never consistently hitting the same spot, and because of the effort made and the speed reached, your float can often hit the water like a missile, plunging down and causing excess disturbance. A cast that is under control should lay the float gently on the surface, with minimum diving, with the bait perfectly stretched out away from the angler in a way that is repeatable and efficient EVERY time. This is why I recommend that you take charge, and use a bigger float.
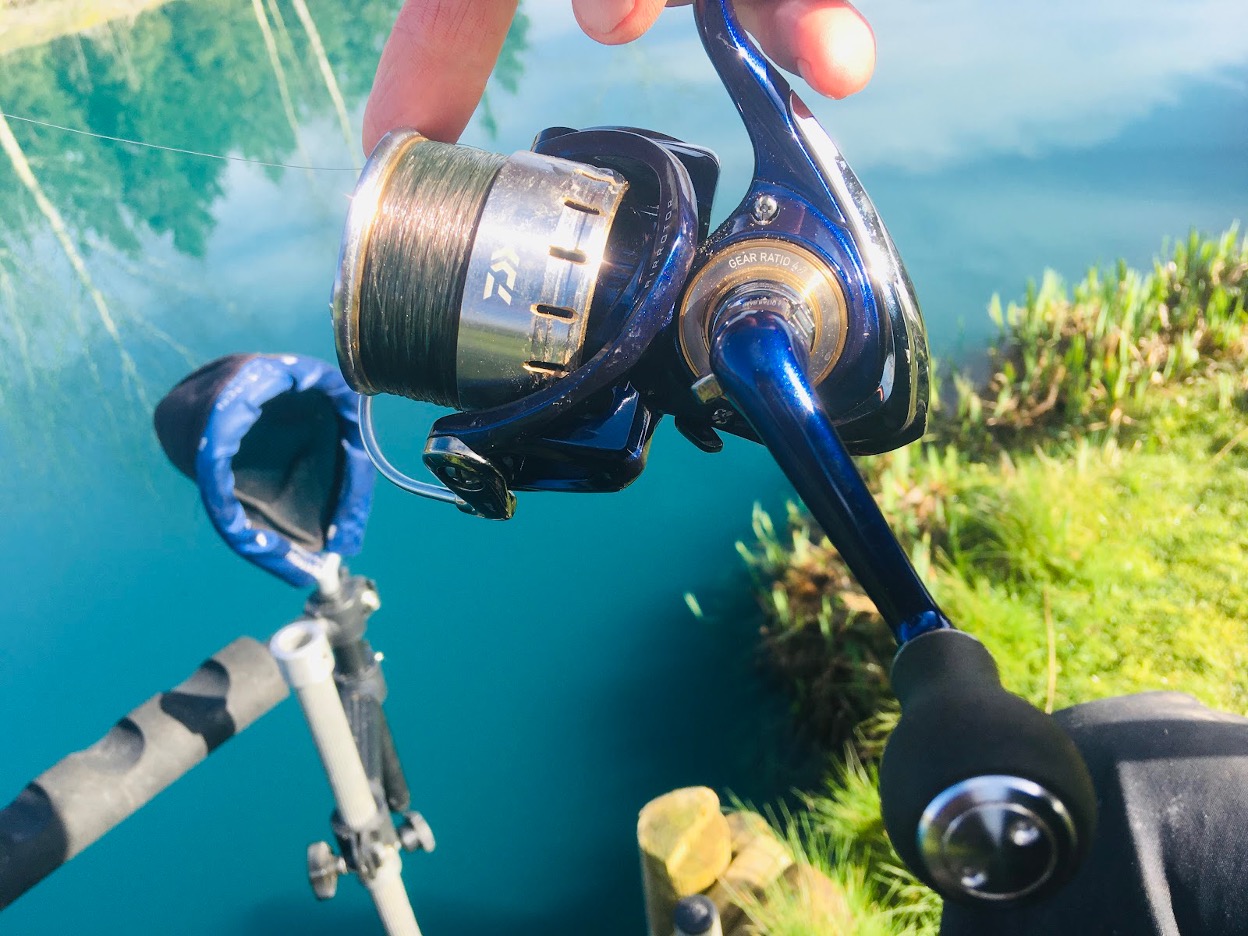
Find a comfortable hand position and work out which finger you prefer to use for dabbing the lip of the spool during the cast. It can vary from angler to angler. This is my preferred hand position.
Dabbing the lip of the spool during the cast allows an angler to control the speed that the line leaves the reel. This is always important but especially so in windy conditions as a large bow of line can form which reduces the ‘directness’ of the contact between angler and float.
Early in the cast your finger will be clear of the line, permitting the line to peel off readily, which means the angler can achieve the required distance. As the float nears its desired distance the angler can brush the line which slows the rate at which the line comes off the spool and begins the process of tightening up and straightening the line. Finally, at the last moment, the angler should dab the finger tight to ‘pinch’ the line against the lip of the spool, this stops the line release and flicks the whole rig out straight, allowing the angler to put the bait within a few inches of where the want it. At least that is the intention. If you are new to casting in this way let me assure everyone that all this takes is practice. Cast into open water at first to hone your skills, that way an errant cast won’t put your rig up a tree. Experimentation and experience will improve muscle memory and eventually, with a little practice, a correct cast can be made every time and you won’t even think about what you are doing.
Silence is golden
I pride myself that you almost never hear anything from my rod on the cast. I want to use an almost silent, easy, steady, and controlled sweep forward, not a frantic high speed launch accompanied by a grunt that signifies the personal effort and a ‘whoosh’ that signifies rod speed.
My desire is to hit my chosen spot EASILY and repeatedly, whether the wind veers or not. I try to make a steady, controlled cast, every single time – and I always like to dab the line coming off the spool to slow down the float and lay everything out in a straight line away from me. Ultimately, because I have the line under control as it leaves the spool, I am able to then STOP the float with my finger in the right spot every cast.
At this point I will again refer you back to my ‘ha ha ha’ statement earlier. I do make mistakes, every angler makes mistakes. But practice makes perfect and it really is a thing of joy when you get into the groove and continually put your float and bait in the same spot time after time.
Two useful accessories for waggler fishing
There are many miscellaneous ’bits and bobs’ that anglers can now buy that overcome some of the irritating little problems they encounter. Below are two items that I never fail to use when fishing a waggler.
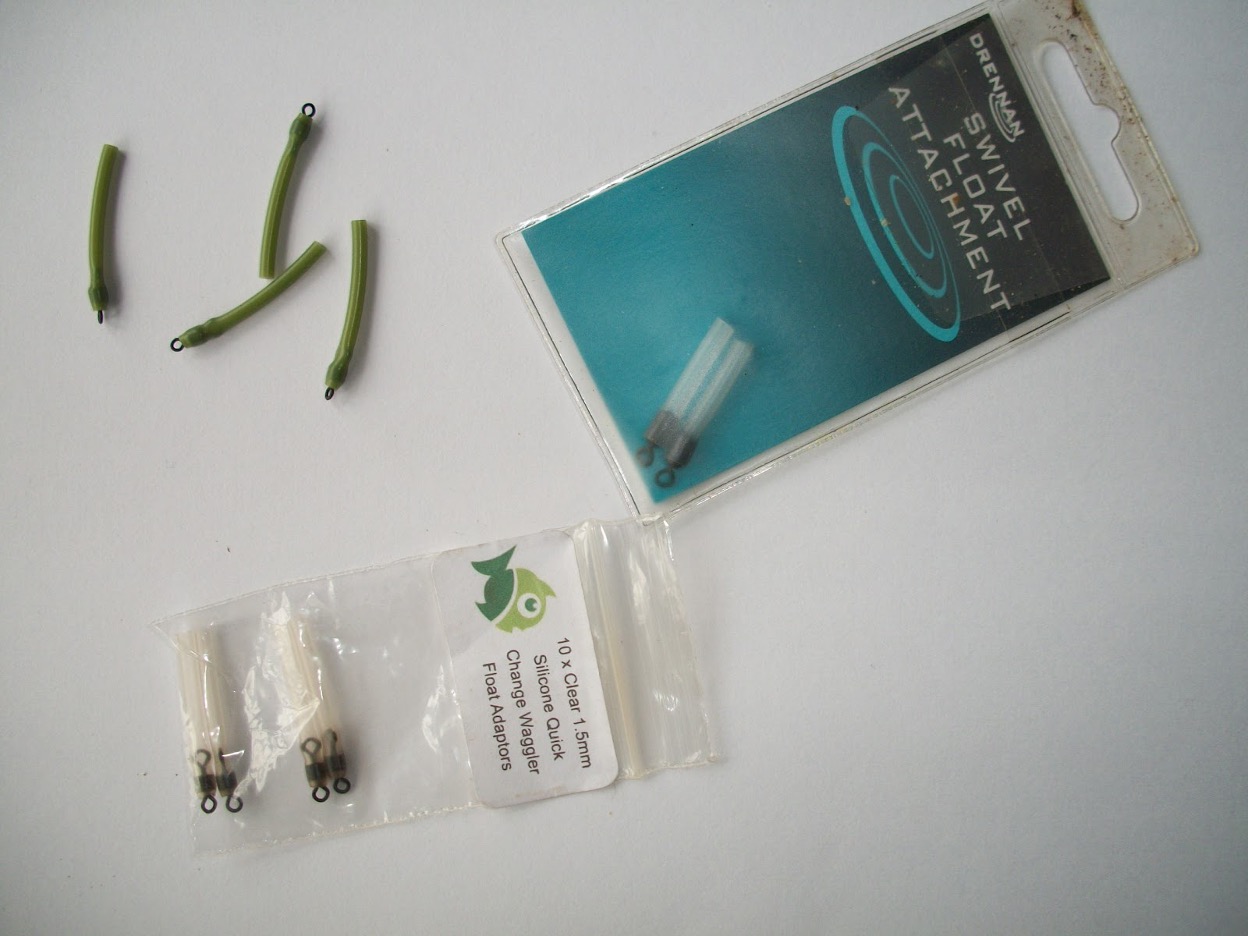
Float adaptors allow the angler to change the float at will without having to break down their end tackle. This is a very small selection of the hundreds of adaptors I own. They come in various sizes and with varying sizes of swivel. The smaller swivels are very useful for use with a sliding waggler.
Float adaptors
No angler can avoid having the occasional problem when using a waggler float. By its very nature the method puts more strain onto the end tackle than a lot of other methods. I have had floats break, fall apart, split and take on water and I have had floats that have just come off the line on the cast (or when losing a fish) only to simply disappear over the horizon. For this reason I ALWAYS use a swivel float adaptor. Rather than having to break down my end tackle, an adaptor allows for a swift replacement float to be installed. This is useful not only for overcoming damage or breakages but also if an angler just wants to try a lighter or heavier float, or maybe a different pattern of float entirely, the use of an adaptor means this becomes a simple process.
Hooklink swivels
One of my favourite ways of using a waggler is when I spray maggots, cast into the middle of them, wait for the hookbait to fall through the water, and I try to catch on the drop. I can do this all day and I will very often cast as much as once a minute or more. Much of my time is spent rapidly retrieving my bait to quickly cast out again. This kind of fishing, as enjoyable as it is to me, brings its own problems. Namely the dreaded LINE SPIN!
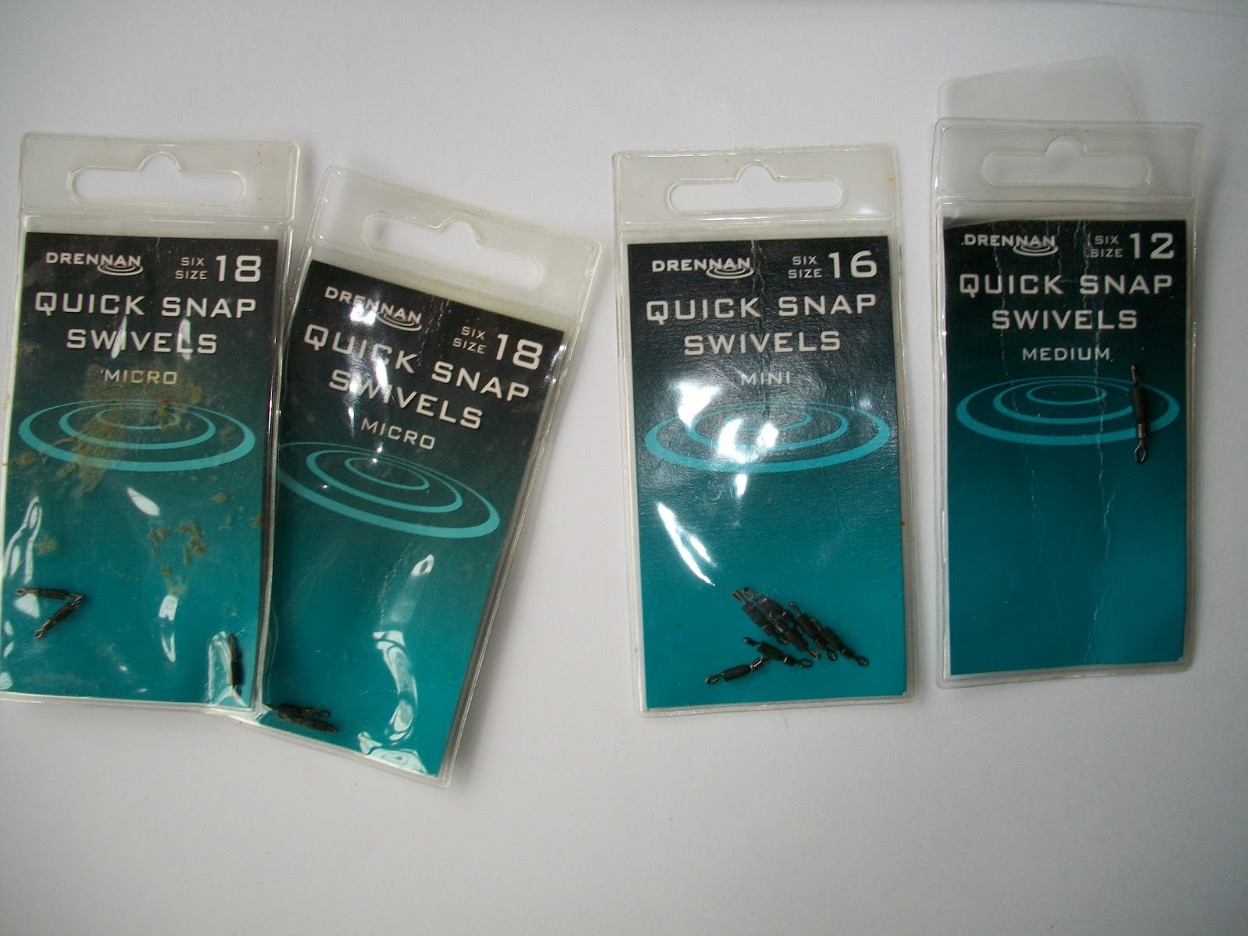
I will use any hooklink swivels I can find but my favourites are generally the smaller sizes. The sizes are confusing so here is a list of the numbers each manufacturer uses.
Quick snap swivels – Drennan available in four sizes 18 (micro) 16 (mini), 14 (small), 12 (med)
Quick change swivels – Preston Innovations available in two sizes small and medium.
Fine quick snap – Cralusso available in four sizes 14 (smallest) 12, 10, 8 (largest)
When retrieving your float, and making repeated casts, one of the biggest issues is the line twist induced into your hook length The thinner the line used the worse this becomes, so light line waggler fishing is particularly prone. This is when your baited hook acts more like a propeller and spins furiously as it is pulled through the water, and it can be especially problematic on moving water. Repeated twisting can result in a hooklength that spirals itself into a knot that becomes un-removable, effectively scrapping the line.
Maggots on the hook, especially two maggots on the hook, are particularly prone to this problem, though pellets and corn can cause problems too. If you are happy to repeatedly change your hooklength every ten minutes or so this will not be a problem to you. Me? I’d much rather use a hooklink swivel to allow the bait to spin without twisting the line into a knot.
Hooklink swivels are available in multiple sizes and will act as the final tell-tale or dropper shot for most of my waggler fishing. I invariably use the smallest size available and have even caught and landed double figure carp (accidentally) on the micro sizes without the swivel failing, though if I were actually targeting bigger fish I will also use the next size up. They are called different names, and are described with different size labels by different manufacturers, which can be confusing, but they are essentially identical no matter who you buy them from. Drennan, Preston Innovations and Cralusso are the three main manufacturers that I use.
Conclusion
Wagglers are great on any still water and, for me, are even better on rivers where they can particularly cover all far bank fishing. Even on a narrow canal wagglers can be used because they allow an angler to cast down along the far bank, dropping in as close to far-bank vegetation as possible, causing the minimum disturbance.
Deep water, such as reservoirs and some gravel pits, can also be tackled with a sliding waggler and I have often done a spot of waggler fishing off the rocks into the sea when on holiday. My biggest mullet came from the tidal Hayle Estuary using a waggler and a loaf of bread. It is a tremendously versatile and enjoyable method and with a little imagination can be used almost anywhere.
Hopefully my explanations here have simplified a few of the mysteries for of some of you, and perhaps for the rest I have merely underlined some of the things you already knew. Whatever camp you are in, and whatever skill level you are at, I hope that all of you found something of interest and that you will go away determined to set up your waggler rod and have a crack yourself. Let me know how you get on.
FAQs
Should I clip up when waggler fishing?
I personally never clip up when waggler fishing. Having honed my cast over years I can put my float near to where I want it often enough without using the clip. However, provided you are absolutely confident that big fish are not going to break your end tackle, on most still waters there are only a few reasons why you shouldn’t.
First reason why you should not clip up is that it is counterproductive to rely on your line clip to achieve repeatable casts. All you are doing is stopping yourself from developing your skills fully. If you stop the float manually, and keep on practicing until you get it right, it will always be the best way to learn.
The second reason is that not being clipped up allows an angler to deliberately cast to different places and to target fish from all over their peg. Spraying maggots, for example, rarely keeps the feed area super tight, and this gives a wide catch area. Consequently it can be beneficial to pick fish off from the periphery of your main feed casting both short and long.
Finally, and most importantly in my opinion, you cannot clip up if you are running your waggler down a river. By far the most exciting aspect to waggler fishing is the opportunity it brings on rivers. I think it best to use the same manner of line control required for river fishing in ALL your fishing, and learning how to fish without the clip achieves this.
Should I sink my line when waggler fishing?
Sometimes I do sink my line and sometimes I don’t. I always begin waggler fishing by not sinking my line and providing the tow is not too strong. I will continue to fish that way all day.
Most of my stillwater waggler fishing is done shallow, trying to catch fish ‘on the drop’. I like to feed, cast into the middle of the feed, and pick fish off as my bait is falling through the water. I am a busy angler and as soon as my float is fully settled I sometimes give my float a flick with my rod tip, lifting my hookbait, to allow the bait to fall again through the layers. More often I strike as soon as I think my bait has completed its fall and if I haven’t ’snagged’ a fish I will wind back in and go through the whole process again. On days like this, with repeated regular casts, I can very often get away without sinking my line as my bait is constantly moving anyway and I am fishing shallow so the bait takes less time to settle, which means there is no advantage to do so.
On the other hand I will usually sink my line if I am fishing with my bait on the bottom, or if I am trying to catch ‘on the drop’ in deep water. The extra time required for a bait to fall twelve feet, as opposed to just two or three feet, means that on the drop fishing in deep water will be benefited by having a static float. The same is true with a bottom bait as I don’t want my hookbait to be dragged unnaturally along the bottom. So, if there is a wind that blows my float off line or I just want to nail a bait to the bottom, I will always sink my line.

On a big deep water like this it is often more beneficial to always sink the line. Even fishing shallow can be a case of fishing at six feet depth in twelve foot of water. The time it takes for your bait to fall means that the wind and ‘chop’ on this kind of venue will pull your bait yards off line. The wind never drops on a wide open location like this so get used to sinking your line every cast.
How do you sink your line?
As soon as your float has settled, plunge the tip of your rod under the surface, give the reel a turn to tighten the line between you and your float, and speedily flick the rod tip up out of the water.
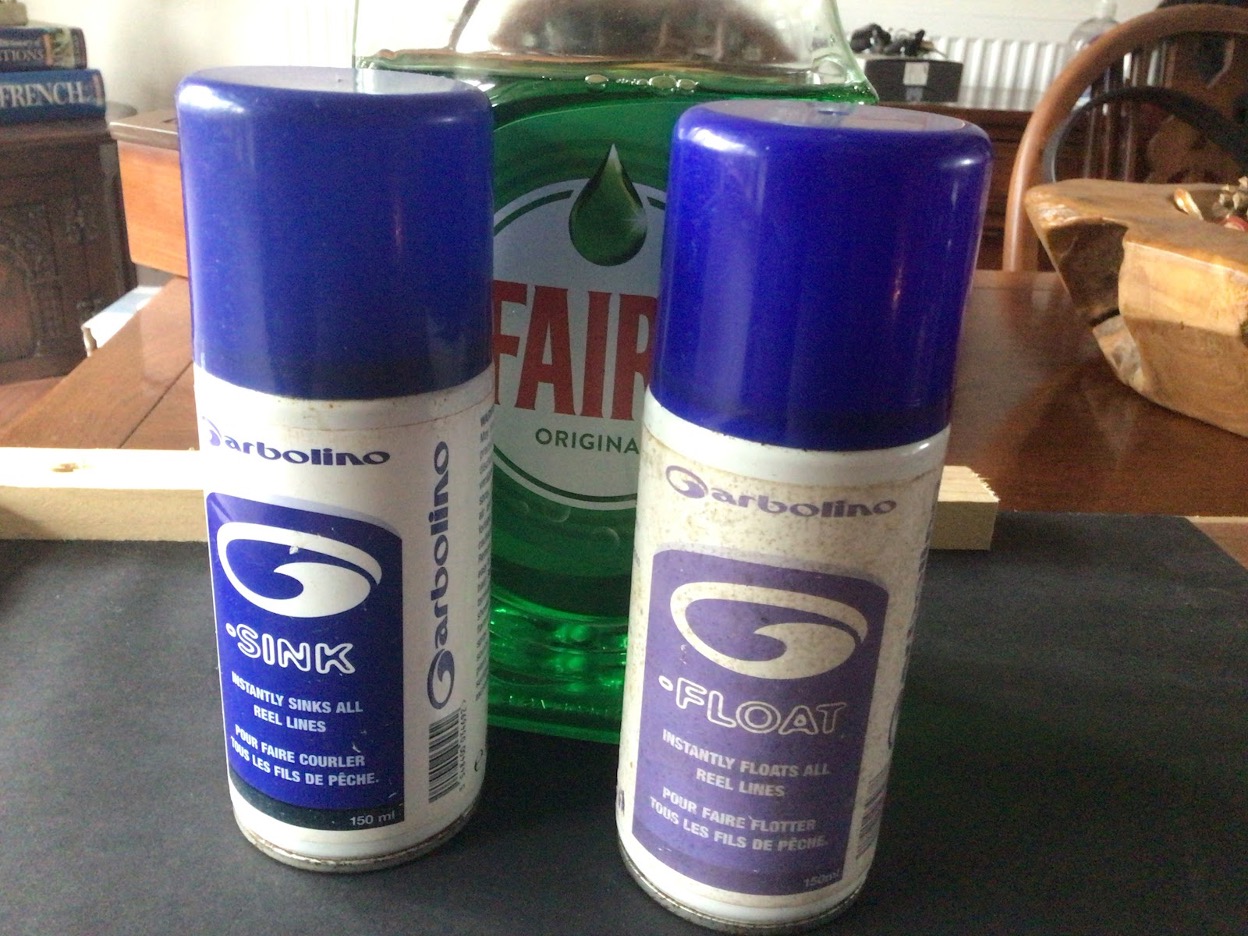
Line ‘sink’ and line ‘float’ are the two items I use to treat my line. Washing up liquid is also brilliant for degreasing line and these three items are generally all you need. There are loads more manufacturers making this kind of stuff and these Garbolino products may possibly no longer available as I have had these two aerosols for what seems like forever.
Many lines these days will happily lie on the surface of the water when you want them to yet can be made to sink by cutting them below the surface with your rod tip. One way to help them to sink is with the use of washing up liquid. Take a dab of washing up liquid, rub it onto your line around the spool and it will degrease your line and assist in breaking the surface tension.
Alternatively there are ready made solutions available from your tackle dealer and I have two Garbolino products in aerosol cans, appropriately named Line Sink and Line Float. They do exactly what it says on the tin.
Loaded or unloaded floats? Which is best?
There are anglers who prefer loaded floats and there are those who prefer unloaded. In general I fall into the latter camp though I do own, and use, loaded wagglers on occasion. Clearly there is no right or wrong choice, though the difference in flexibility and usability between the two types needs to be understood.
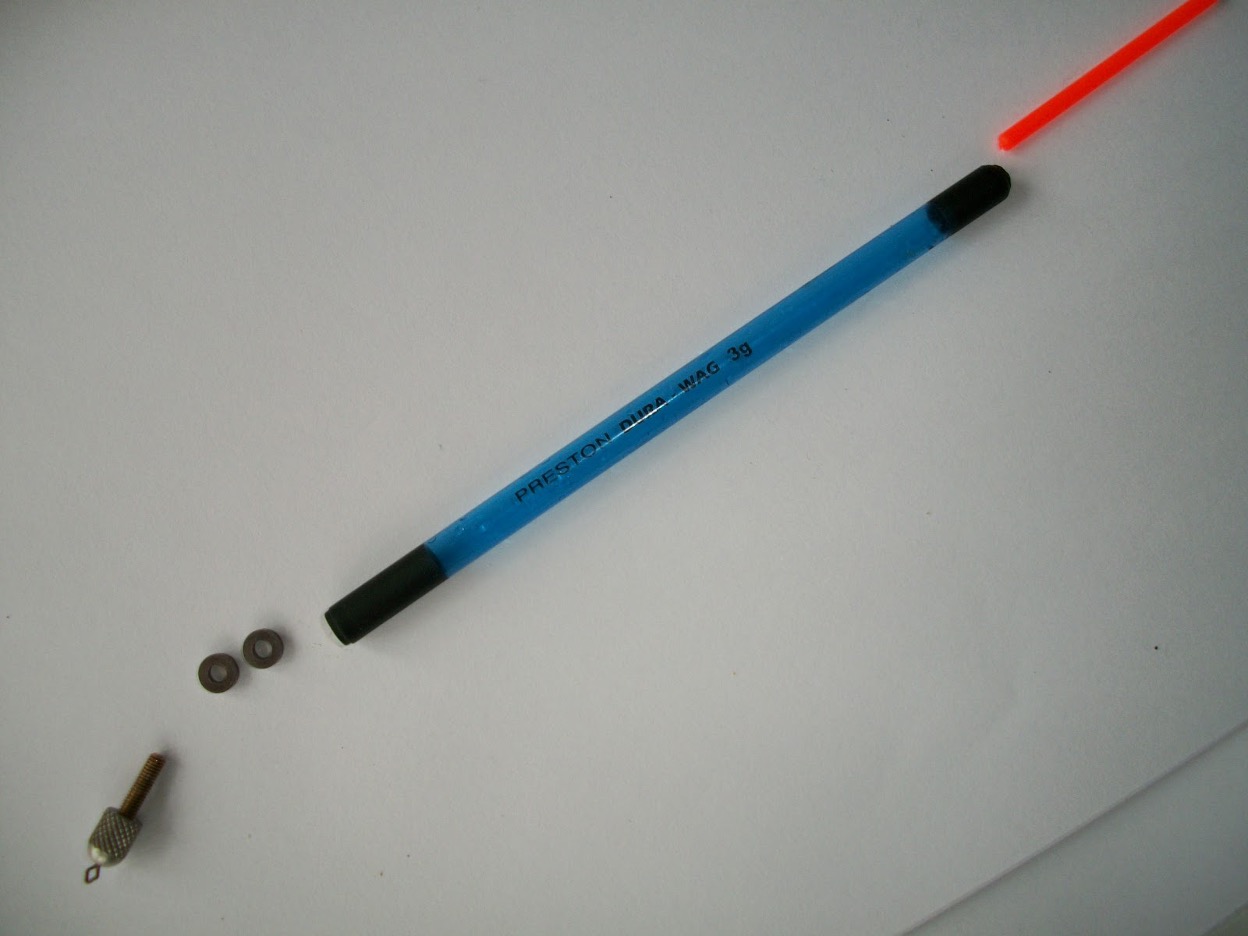
This loaded float has removable weights (the two ‘washers’ at the base of the float). The weights are held captive by the screw-in base. This type of loaded waggler offers flexibility allowing removal of the weights to create less overall loading in the float and allows the addition of more shot down the line. More shot down the line can be useful when the angler needs to get the bait down faster to avoid smaller fish intercepting the bait. Loaded wagglers without these removable weights lack the flexibility to do this.
Loaded insert waggler floats have weight pre-installed into the base, meaning that the only additional shot required is a few small ‘tell-tale’ shot to take the bait down and reduce the amount of insert on show. Loaded wagglers are neater than unloaded because their casting weight is within the streamlined shape of the float. Many anglers feel this design casts better and there is no doubt that they are simple to shot correctly. However, in my experience many loaded wagglers are already too heavily weighted and, when compared to unloaded wagglers, they do not accept enough additional shot to meet the flexibility I require. To lock these floats in place they invariably require sliding rubber float stops on either side, two below and one above. This requirement for float stops is an additional ’faff’ for some.
To overcome this problem some loaded floats have screw-on adaptors in the base that hold and retain multiple weights in the form of thick washers. This enables the angler to remove some or all of the loading. The problem I have found with these wagglers is that the thread can work its way loose and the float flies apart in use. As you can imagine this is a tad irritating. Conversely I have found that my efforts to tighten the weights sufficiently to stop them falling apart can easily result in me twisting the whole adaptor out of the bottom of the float. This is even more aggravating especially when I have forked out three or four quid on each float.
Un-loaded insert waggler floats have no weight pre-installed into the base, this means the angler must apply shot to either side of the base to create a bulk that takes the majority of the float down. Then all that is required is a few small ‘tell-tale’ shot to take the bait down and reduce the amount of insert on show. Because the angler creates their own bulk it is possible to reduce the overall bulk weight and increase the amount of trimming ‘tell-tale’ shot which means the set-up can be as versatile and adaptable as the angler might require. Despite being a less streamlined system than a loaded float my own feeling is that there is little or no discernible difference in the way they cast.
Comments
Leave a Reply
You must be logged in to post a comment.
4 thoughts on “A Beginner’s Guide to fishing the Waggler”
Similar articles

In Memory of Peter Cliff
It is with heavy hearts that we announce the passing of Peter Cliff, the founder of Fisheries.co.uk, who passed away in May 2025. Peter’s vision and dedication transformed what began as an idea 26 years ago into one of the…
River Fishing – A guide to getting started
Are you thinking of going for a trip to the river in 2025 but find yourself filled with trepidation because you have never fished running water before? Well I want you to relax. Let us take the mysteries out of…
A guide to fishing licences in 2025
Whether you want to become a new angler or you’ve been fishing for years, you will be required to obtain the Environment Agency Rod Licence. In this article we explain what you’ll need if you want to go fishing in…
Make the most of the 2025 river season with this in-depth guide to fishing rivers
If you’re new to fishing rivers, or just fancy a change from fishing stillwaters, this guide will help you make the most of the new 2025 river fishing season. With advice on reading the water, what species to fish for…
Our guide to fishing this spring (2025)
With the worst of the weather over (we hope!) and with spring finally here, it’s time to clean out that tackle box and get on the bank for some spring time fishing.
Take a friend fishing
Get ready to hit the water! From April 18th to May 4th, 2025, you can get a free fishing license to take a buddy out and show them what fishing’s all about. Yep, free! It’s all part of the “Take…Search by Region or County
Find new places to go fishing in your local area or county by choosing your destination below


An excellent helpful article.
Hi there,
many thanks for your kind words. I am really glad that you found it helpful.
Chris
Fantastic article on waggler fishing from chris.I have to agree with chris It’s becoming a dying art
Simply because todays younger anglers and experienced anglers prefer the pole.But i have to say
There is nothing better than catching on the waggler and when your bagging up you know your
Doing it correctly.Absolutely fantastic chris an amazing article i really appreciate it.Derek
Hi Derek,
it is always very pleasant to hear positive words. I find that age has made me enjoy writing about fishing almost as much as I still enjoy the actual. fishing. So it is especially pleasant to get good feedback, not only regarding the subject matter, but also when my words are well received too.
I am glad to hear that you enjoy the waggler as much as I do and hope that between the two of us we can inspire more people to give it a try.
Kind regards
Chris