Fishing using a sliding float
Welcome to our guide to fishing the slider. Our plan is to give a simple and easy to understand step by step explanation of this wonderfully rewarding way of fishing, and we hope that we can stimulate those of you who have never tried before to give it a go. Some of you may have attempted fishing a slider, ended up in an almighty tangle, and thrown the rod up the bank in frustration. Well, fear not, we want you to give it another go!
Why would I need a waggler that slides up the line?
Ninety-nine percent of us coarse anglers use rods that are 13’ or shorter for ninety-nine percent of our fishing. Equally, faced with a water that is deeper than thirteen feet, ninety-nine percent of anglers will leave the float rod in the bag and use a pole in close, or resort to the feeder for ninety-nine percent of the time.
The other one percent of anglers use a slider. This is because the slider is a method that allows anglers to fish a float in water that is deeper than the length of the rod, and for dyed-in-the-wool float anglers like me, there is more pleasure in five minutes float fishing than a whole day’s worth of feeder fishing.

The dam end of this lake is fifteen feet deep. For the angler that prefers float fishing above all else this leaves two options, the pole or a slider. The pole will allow a float to be used but is often limited to a maximum of around 16m from the bank, …. and who wants to hold a 16m pole all day anyway? The best solution is the slider which permits you to fish full depth at distance. Go on, read more. You will thank me in the end.
Two key skills for slider fishing.
Okay, ….. full disclosure here! Despite promising that slider fishing is easy I must admit, before I go on, that I need to own up to the fact that there are two skills you need to possess to make slider fishing easier for yourself. Casting and feathering. Read on to discover how simple that is.
Gentle casting. Firstly you need to be able to cast in a very gentle but positive way without rushing. No urgency, no ‘punching’ the float out hard, just take it easy and use a smooth repeatable action time after time. You can do that, can’t you?
Feathering the line. Secondly you need to be able to dab your finger on the lip of the spool just as the float is about to land. This is called ‘feathering the line’ and even if you never fish a slider it is a powerful ally if you are fishing any float method because it will lay the hook length and all your shotting out in a nice straight tangle free line as it hits the water.
The key is in the timing and the ‘feel’. Practice makes perfect and providing your casting is exactly as defined in the previous paragraph you will find feathering can be easier and more predictable the more you do it. So, ….. I expect that you can do that without much difficulty too, can’t you? Sorted!
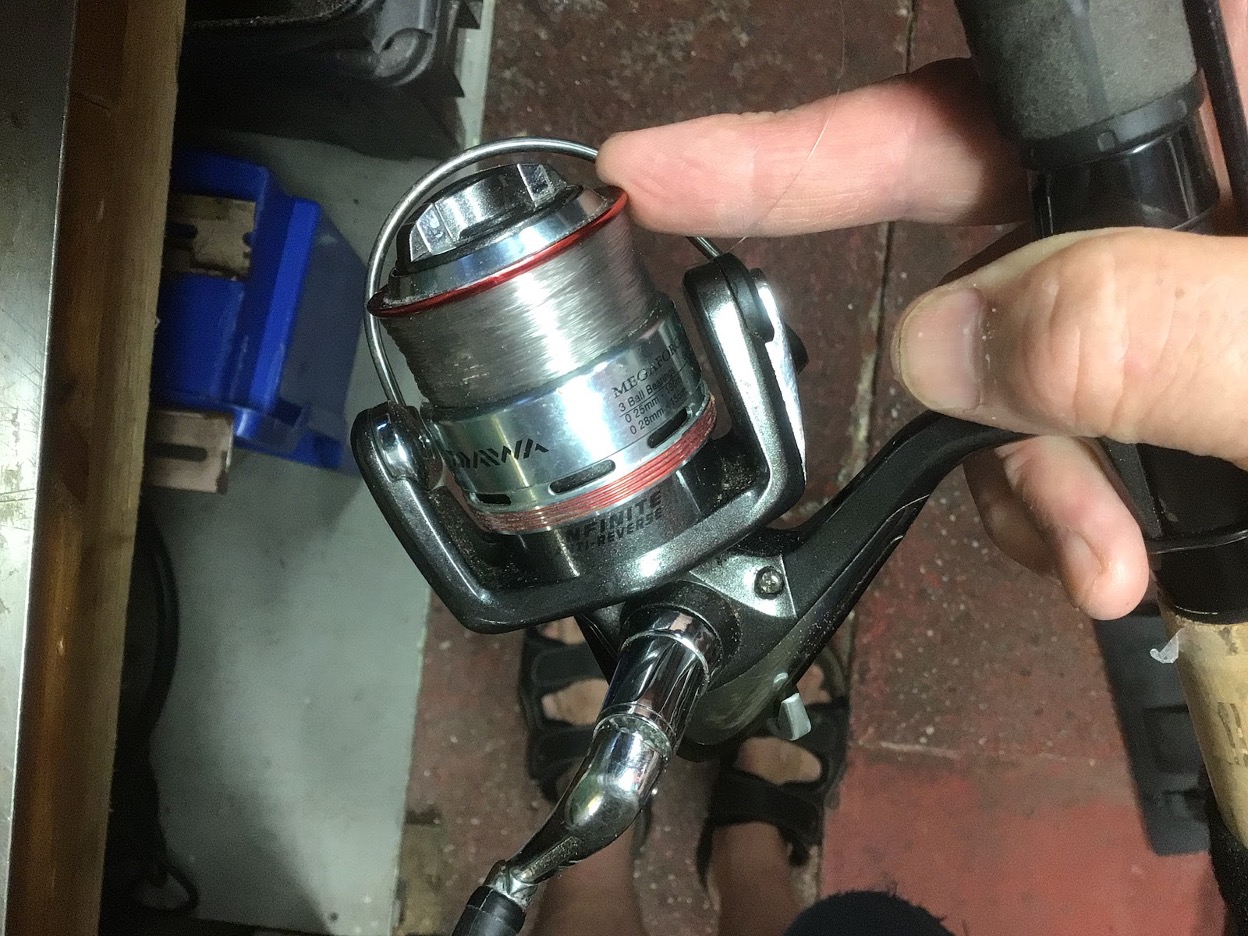
To feather the line this is where your finger should be placed immediately after releasing the line whilst casting. By removing and replacing your finger from the lip of the spool you can control the way the line leaves the spool, slowing it up as you reach your target. By applying this light resistance to the line you can straighten everything out and cause the shotting to settle neatly away from you in a lovely tangle-free straight line. Practice makes perfect so go to it.
Don’t be put off.
You might still be afraid of slider fishing because of that weird ‘slider-knot thingy,’ and if you are unfamiliar with tying different knots you may be daunted by the prospect. Never fear, though, it is much easier than you think.
In this world of commercial fishing, where the pole is the first item out of the bag (and often the ONLY item, let’s be honest) many young anglers today don’t hone the skills of fishing with a rod and line. Then, because of the aforementioned requirement for gentle casting and feathering, slider fishing especially can frighten an angler away who doesn’t regularly use rod and line.
However, master those two tricks (which will benefit ALL your rod-and-line angling) and I think that I can sort out the rest for you. I will simplify the slider-knot and offer some rules regarding shotting patterns that will almost eliminate the possibility of tangling, …. but don’t hold me to that. Note that word ‘almost’ because even experienced anglers, well versed in the dark arts, will falter on odd occasions. If anyone gives you a guarantee in life, count your fingers after shaking hands.
Yes, it’s true, even the ‘professional anglers’ will get into the odd tangle but the difference is they accept it, they don’t get flustered by it, and they move on. Sometimes we all give up prematurely, thinking that we will never get the hang of something new, and very often we give up just at the point where we are about to turn a corner and start to enjoy ourselves again. It can be very frustrating can’t it, this fishing lark?
Let’s start at the very beginning – a very good place to start!
A thirteen foot deep swim with a 13’ rod.
Imagine a bog-standard waggler set-up where the float is trapped on the line by split-shot, with a few of those shot immediately underneath the float forming a bulk, and a single locking-shot above to stop the float from running up the line. With a thirteen foot rod it may just be possible for the average angler to fish comfortably in a thirteen foot deep swim, but it is not something that you would really want to struggle with all day, is it? Landing a fish would also be extremely difficult with so much line below the rod-tip, as would casting in the first place.
A twenty foot deep swim with a 13’ rod
Now imagine the swim is actually 20’ deep but you still only have that thirteen foot rod with you. So, …. what are you going to do with all that extra line dangling from your rod tip now? You may have struggled to dangle thirteen foot of line from your rod tip, but you definitely won’t manage twenty.
Perhaps the first step towards a solution is to move the float out of the way? Okay, slide all the bulk shot that was positioned just below the float all the way down your line towards your hook. If you place these bulk shot approximately four foot from the hook and simultaneously allow the float to slide down the line to rest on the bulk in their new lower position, you will now find that you can wind the float up to within four feet of the rod tip.
Oops, did he make a mistake?
Aha, you will say, gotcha! I can hear you collectively shouting that you can’t do this because the locking stop shot above the float is still twenty foot up the line and it will not go through the rod rings. What kind of idiot am I?
Hooray, that is quite correct. Well spotted, you can give yourself a pat on the back because it means that not only have you been paying attention but also that my explanation is still clear enough for you to understand.
The key to slider fishing – the slider knot.
What you now will be realising is that what you actually need to do to overcome the problem is to replace that locking stop-shot with something that is big enough to stop the float from moving up the line, BUT small enough to go through the rod rings. The ‘float-stop device’ still needs to cock the float at the same depth as it did before, and in our example that position will be approximately twenty feet from the hook length because the swim is twenty feet deep.
To achieve this you will need to wind the ‘float-stop device’ through the rod rings because you need it out of the way when you are casting. This ‘float-stop device’ is in fact a slider-knot and is the key component to slider fishing.
Creating a slider knot. A picture paints a thousand words.
A slider knot is dead simple. Nothing to worry about here. It is just a short piece of line that is tied onto the main line but tied in a way that enables the angler to slide it up and down the main line. Take a look at the accompanying illustration and if you practice tying a slider knot half a dozen times you will never forget it. It really is that simple.
The finished knot must be small enough pass through the rod rings, grip the mainline with sufficient tenacity that it doesn’t move once positioned, and yet be big enough to stop the float from going up the line.
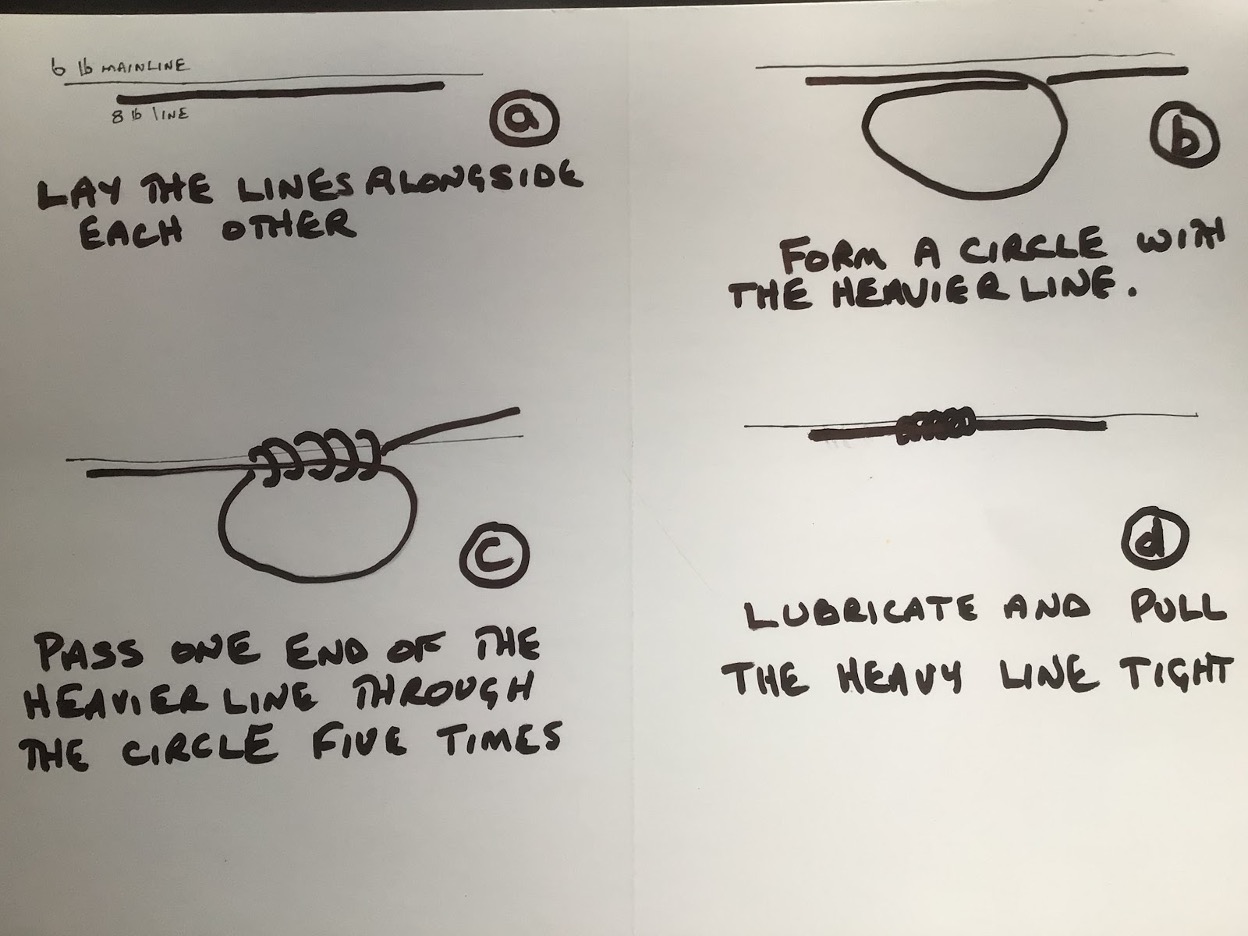
When tying a slider knot one of my personal rules is to always use a heavier piece of line for the knot than the mainline. The additional strength and thickness of the knot line means that as you pull it tight it will distort the shape of the mainline, digging into the mainline causing it be more difficult to slide the knot. This is good! Nobody wants a slider knot that is so slack that it keeps moving of its own accord. If the mainline were heavier than the knot line, the mainline would remain straight and un-distorted and the knot line would simply lie on top of it. As an analogy imagine gripping a rope in your closed fist. A sharp tug may pull the rope out of your grasp. Now again imagine holding the same rope in your closed fist but this time you have also intertwined it between your fingers. Now a sharp tug will not pull the rope out of your grasp because the deviations in the rope create more friction..
Using the right tackle and techniques when slider fishing.
Ideally you might use a thirteen foot rod for slider fishing. However, the principles behind it are still valid for shorter or longer rods. A great longer rod might make extra deep swims even easier to take on. A short rod, set up with a slider, can bring advantage when your access to the water is tight overhead.
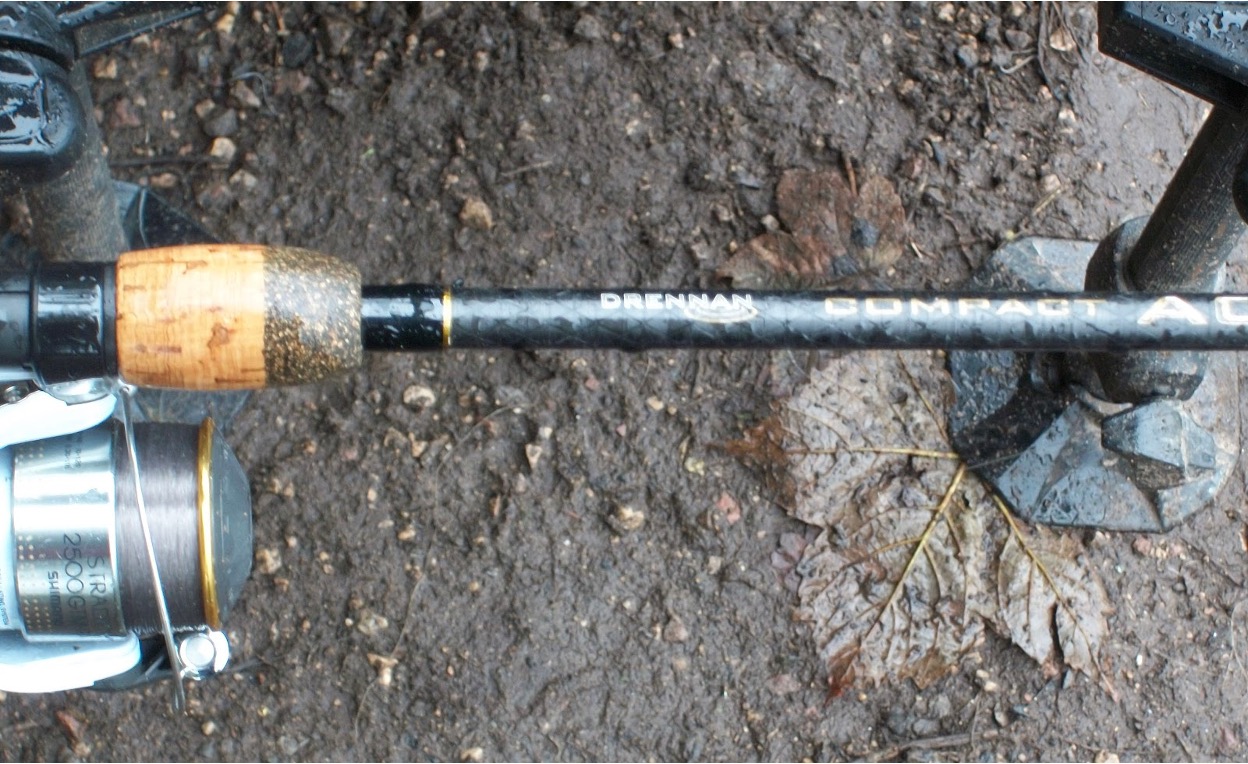
My new favourite rod for slider fishing? A Drennan 13’ Acolyte Ultra PLUS Compact. (Similar model shown here) – Not only is it super-light and super-slim it has lots of backbone for casting. On a recent field test I swapped my slider rig from my 13’ Daiwa Yank ‘n Bank on to this rod. After fishing the Daiwa all morning and having got used to its performance I was amazed to find that my slow casual lob was easily achieving ten more metres of casting distance with the Drennan than it had been with the Daiwa. Just goes to show what spending an extra two hundred quid will get you. Had you asked me before I conducted the test which rod was ‘the best’ I might not have been able to give a definitive answer. But now think I can. Does that mean I need to buy another Acolyte? Don’t tell the missus.
Rod choice.
Whatever rod you choose, you should select one with big enough rings to allow the slider knot to pass through easily on the cast. Generally a slightly more powerful rod will be an advantage because the best floats for slider fishing are heavy bodied wagglers that will require a fairly heavy bulk. For this reason a pellet waggler rod, or a similar stepped-up float rod such as a specialist rod, will be ideal. Don’t be tempted to use a super lightweight float rod with small eyes because you will frustrate yourself to distraction with the knot sticking as you cast. Equally, a rod that is too powerful will bump off fish like roach and perch and this is counterproductive because there is no minimum size to the fish that you can catch with a slider.
Line choice.
Because you will usually be casting a heavy float I suggest you use a 5lb or 6lb mainline and make up your slider knot using 8lb to 12lb line. Don’t be tempted to use an even thicker/stronger line than 12lb even if your knot is slipping, or even if the float is passing over the knot. The simple solution to this problem is to stick to the lighter line but put two knots next to each other in tandem.
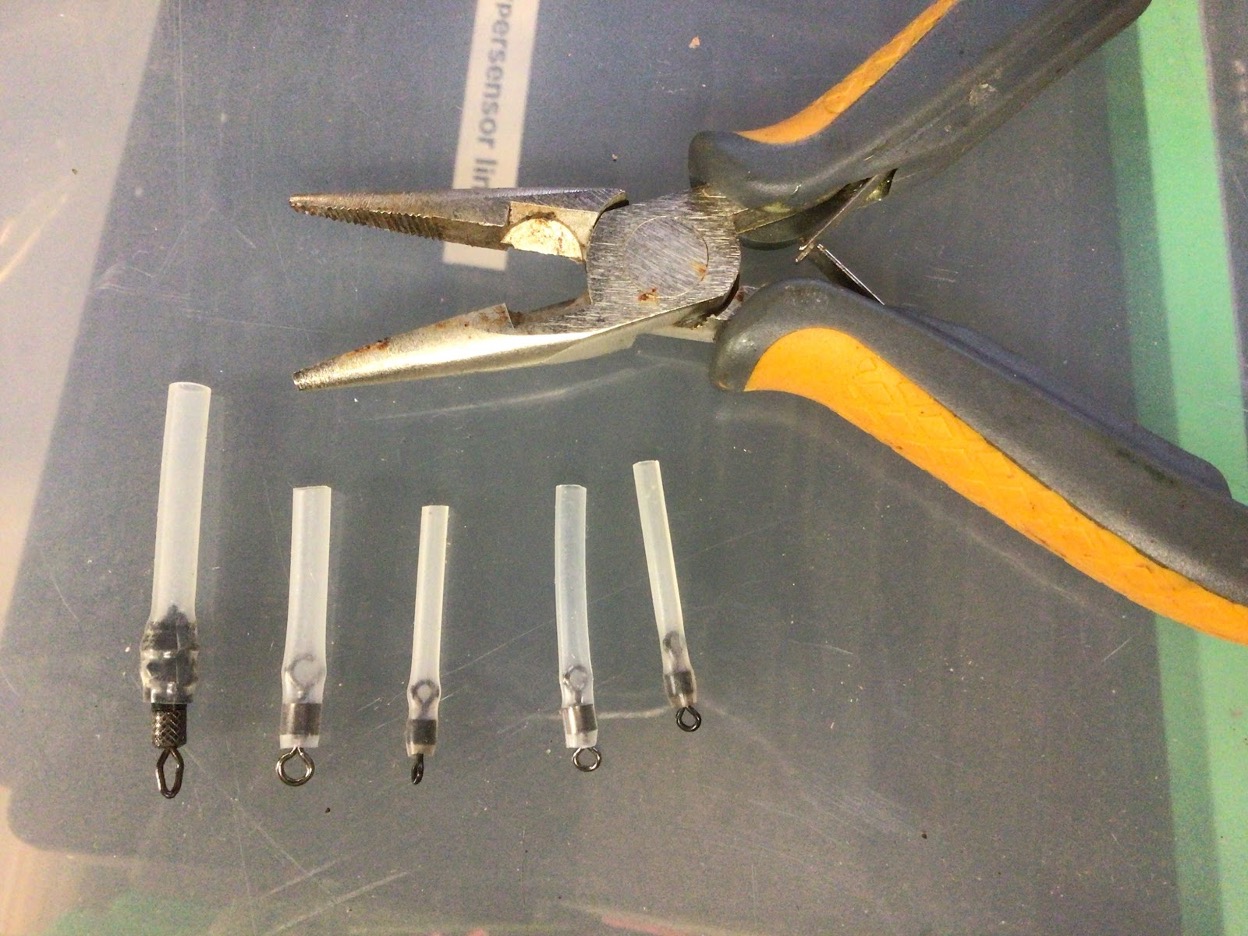
You will find great benefit in using a swivel float adaptor on every waggler you use. They enable the angler to easily replace one float with another. When slider fishing the swiveling eye is essential to allow the bulk to pull line through more easily and to sort the float out as the shotting settles. The left hand option above has a ‘diamond eye’ which is narrower and more extended than a round option. This diamond shape can be excellent with a sliding knot as it provides more resistance to letting the knot run through whilst still having a large enough hole to easily pass the mainline. I use my pliers to pinch the standard swivels if required to create a more oblong eye.
Reels to use for slider.
A 4000 size reel and 6lb mainline is the biggest I use for slider work, and my original ‘go to’ reel was a Shimano Aero Match in size 4000 though now I mostly use a Shimano 2500 GTM Stradic. Even in this small size it works fine with Daiwa 6lb Hypersensor line.
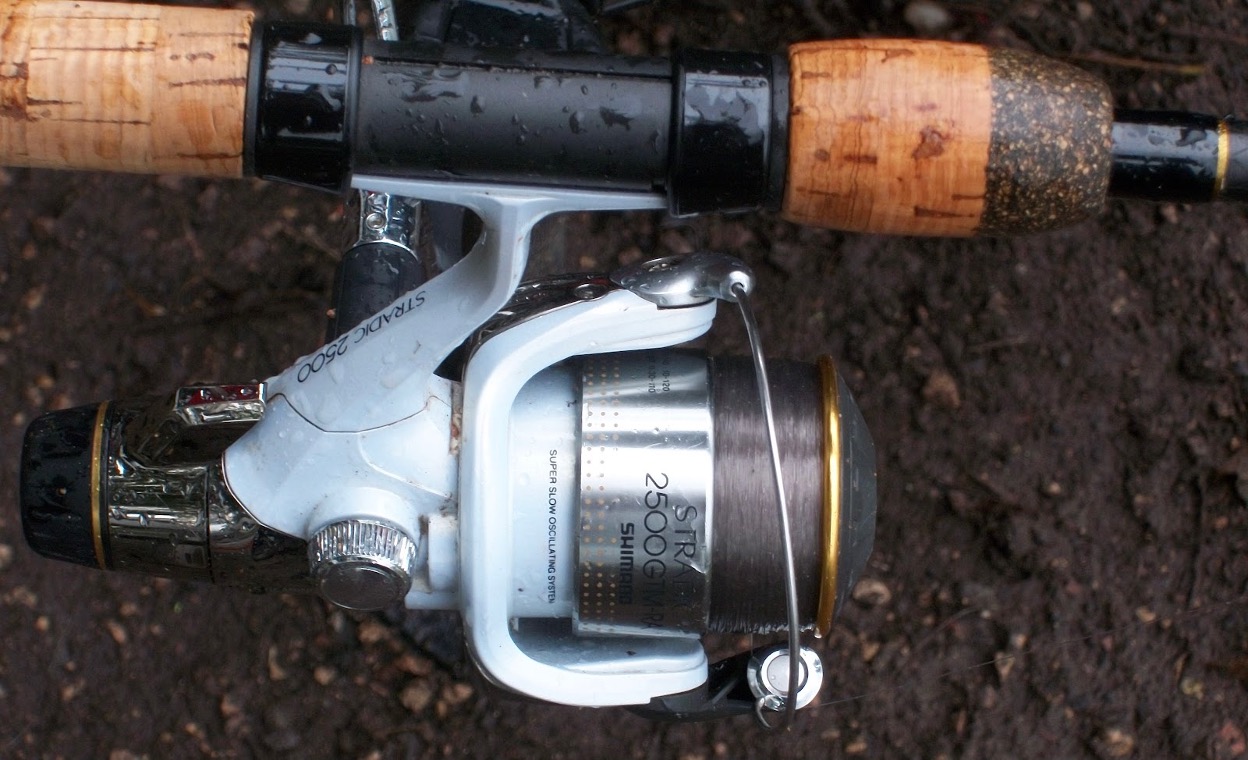
I simply love these reels. They are light, balanced, efficient and fabulously smooth. Although I only use the size 2500 I find they can manage all the fish that I am likely to catch. The ‘fighting drag’, which I first thought of as a gimmick that some ‘Snake-Oil salesman’ had dreamt up, I now find is an invaluable tool when playing the unexpected larger specimen. It took me a while to be won over but now I like them so much I bought myself another one. It is a Shimano Stradic 2500 GTM RA and it is a gem. Currently one of a pair of gems in my possession, in fact. Soon to be one of a triplet of gems if I can pick another one up at the right price. Once again, for heaven’s sake, don’t tell the missus.
Slider floats.
I have some whopping big slider floats that I originally used in Ireland back in the 1990s and they are brilliant for the huge open waters that can be found over there. More often than not I now use big Drennan Driftbeater floats for my slider fishing in England. As I have got older I find the big bulbous tip to the antenna is much easier to see at long distance.
Drennan Driftbeater.
When using a Drennan Driftbeater float (or similar) the antenna is a very fine flexible length of carbon. It takes a very few tiny number of shots to sink the float down from the body to the sight tip. On heavier slider floats, with cane or possibly peacock antennas, you may need to use several no 4 shot (or even bigger shot) as droppers. Remember, each shot MUST make a discernible difference to the float otherwise it is just taking up space on the line.
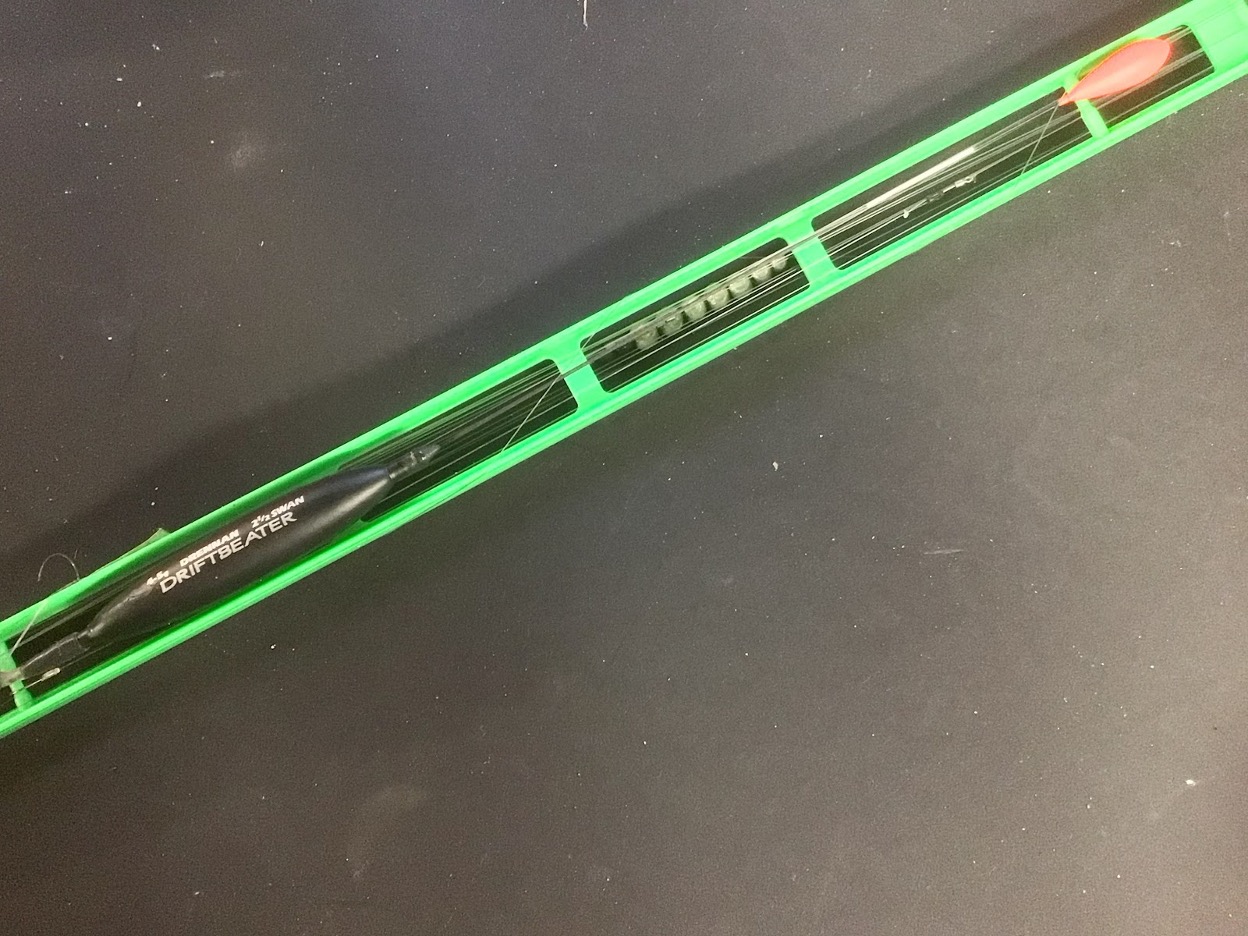
A Drennan Driftbeater float. This float provides me with the perfect option for slider fishing. The antenna is an extremely slender and flexible piece of carbon-fibre and it takes very few small shot to take the body of the float down until just the tip is showing. The lift bites with this float can be amazing as the highly visible and bulbous sight-tip shoots rapidly up out of the water. A brilliant float.
Bodied floats v straight floats.
Generally speaking I only ever use bodied wagglers for slider fishing. I suppose you could use a non-bodied straight waggler float but, for me, the benefits of having a defined buoyant body that requires a large amount of bulk shot to cock it, followed by a few smaller dropper shot to sink a long sensitive antenna, far outweighs the alternative.
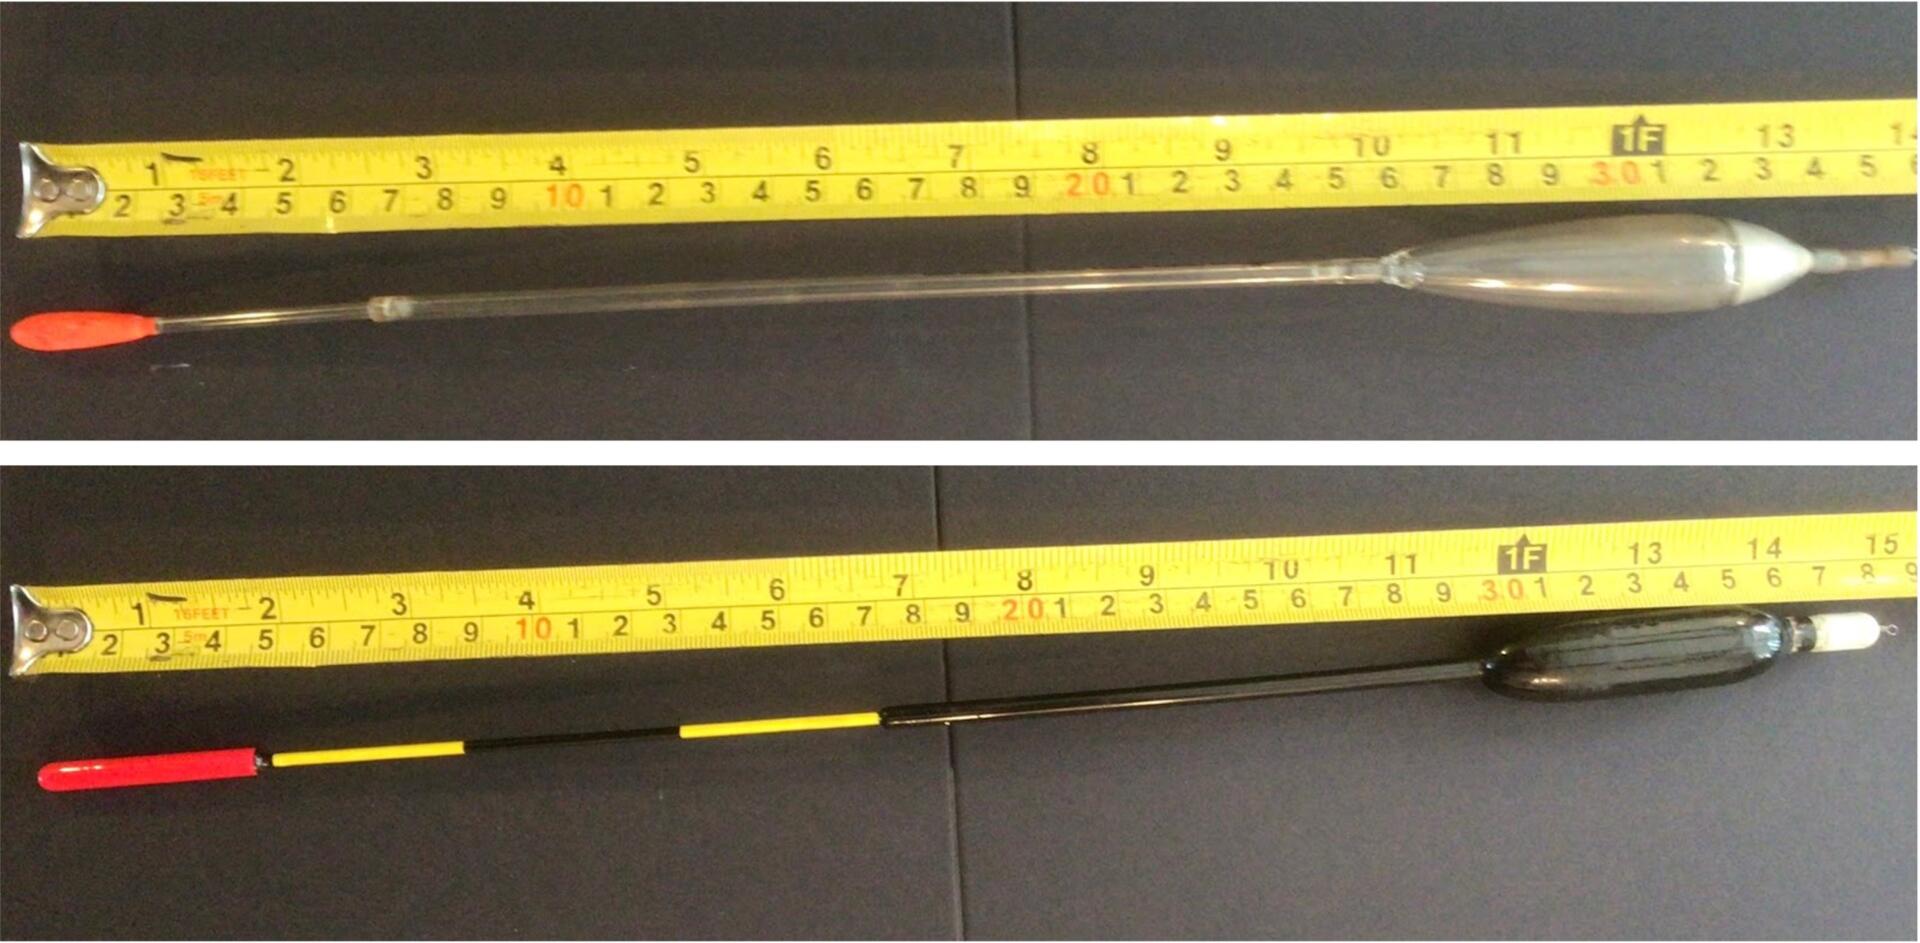
Two of my big bodied wagglers.
The upper float showing in the photo above is a Drennan missile that carries quite a lot of internal loading but still requires three SSG as an additional bulk and four no1 shot to take it down to the bulbous tip. Additional trimming shot can be added to the bulk to ensure that the float is sunk as far as is required. If casting to twenty-five metres or more, on a ‘choppy’ water, the angler may want to fine tune the amount of tip that is on show, especially if the target fish are not giving lift bites. Watching a float disappear every time a wave chops over it, only for it to reappear again, can make it difficult to establish a true bite unless the tip lifts eight inches out of the water, then it’s a ‘no-brainer’.
The lower float will have a similar shotting requirement as the Drennan example above but it is a hand-made equivalent with a balsa body, a reed antenna, and a peacock-quill sight tip. The loading is still only partial and will only sink half of the body. Having an additional heavy bulk is essential to getting the bait down quickly and also expedites the process of putting the float to work.
Loaded slider float v unloaded slider float
Sometimes I use loaded wagglers but in the main, unless the loaded float has been made specifically to be used as a slider, I use a non-loaded float. Loaded floats that are specifically made as sliders are not fully loaded because the method inherently requires there to be enough additional shot to pull easily through the float eye and get the bait down reasonably quickly. With a fully loaded float you cannot add sufficient additional weight to create an effective bulk.
The fixed loading in a ‘true’ slider float is usually only sufficient to partially cock the float. This means the float should still require a heavy additional bulk to be applied to the rig. This is vitally important. A slider set-up must have sufficient weight in the bulk to readily pull the line through the float, and it must also do this relatively quickly to get the bait to the bottom of the swim and allow the angler to have a means of bite detection as soon as is reasonably possible.
How to correctly set up a slider float. Follow these rules!
Bulk and droppers.
There are two elements to the shotting pattern when setting up a slider. There is a bulk of shot and then there are the spread out ‘dropper’ shots below that bulk. Keep to these two elements and keep your shotting simple, this will pay dividends because a simple shotting pattern will tangle far less.
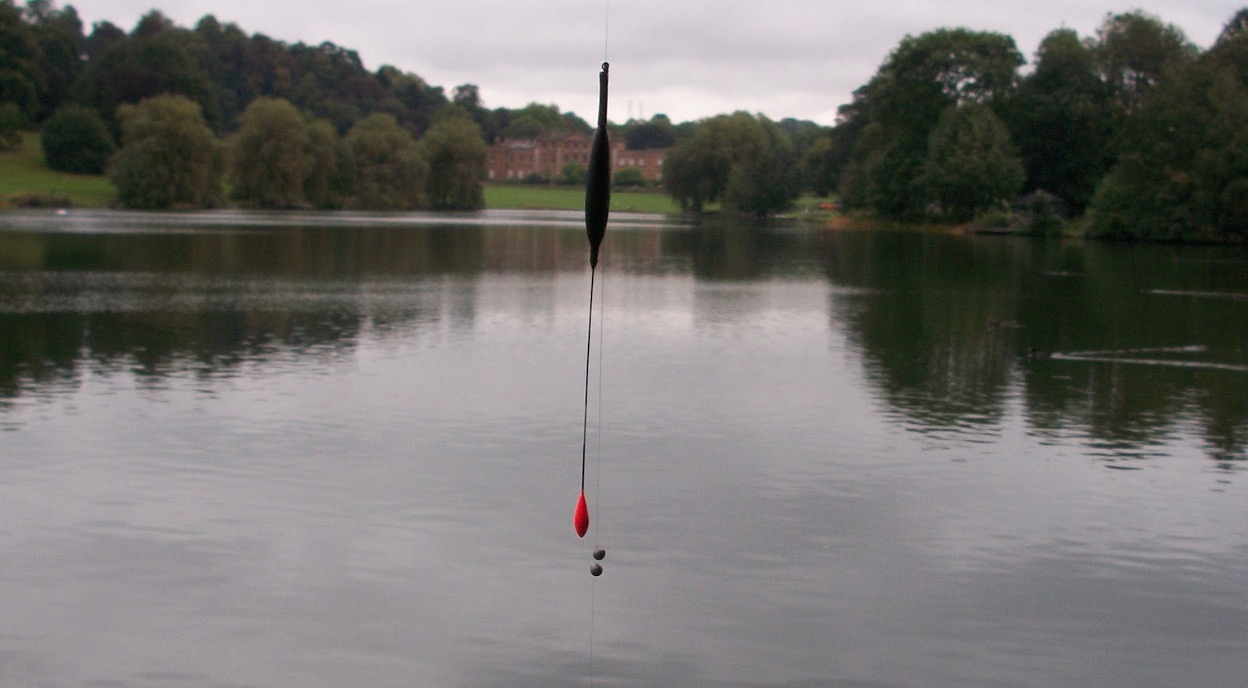
In this photo the float is hanging from a rubber float stop. Note that the two SSG forming the bulk are unable to come into contact with the float. This avoids unnecessary damage to the float. I always hang my UNLOADED slider floats OFF the bulk in this way.
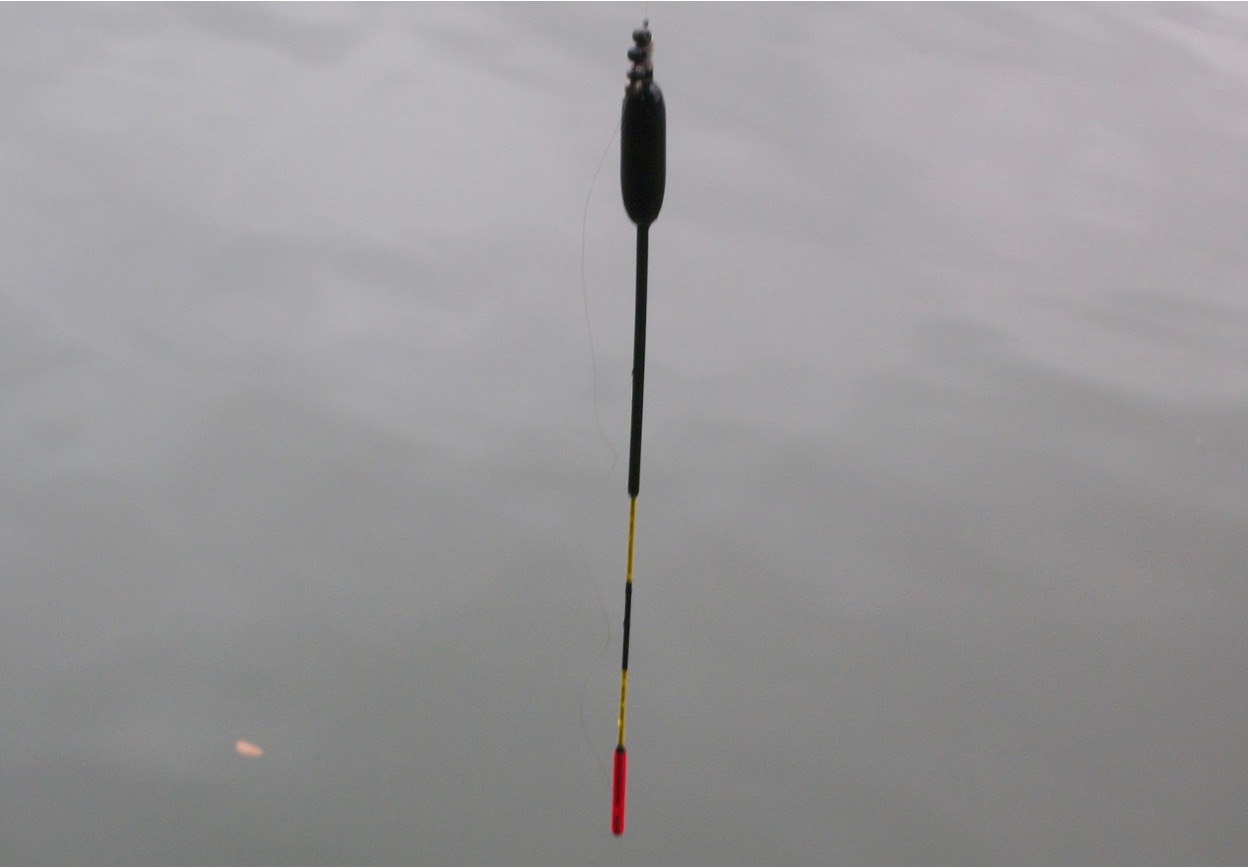
In this photo you can see the float is actually resting ON the bulk shot, consisting of a group of four SSG. The reason for fishing ON the bulk is that this float is LOADED and it cannot work unless all the casting weight is in one location. If it were set up with the float OFF the bulk the two heavy weights, separated by a few inches, would contest each other in flight and cause an almighty tangle. The downside to setting up ON the bulk is that the bulk will inevitably bang against the body of the float causing unwanted damage. I much prefer fishing with an UNLOADED float hanging OFF the bulk these days.
Purpose of the bulk.
The bulk should be sufficient to sink the body of the float – but no more than that. You can use an olivette for this but I find that a spread of shot is less prone to tangle. If you prefer to use an olivette chosing the right size at the venue might be a slow process. To select a single olivette correctly first time is a job easier done in a shotting tube at home. If you can pre-select the olivette to go with the float then that will be an advantage but not everyone has a shotting tube.
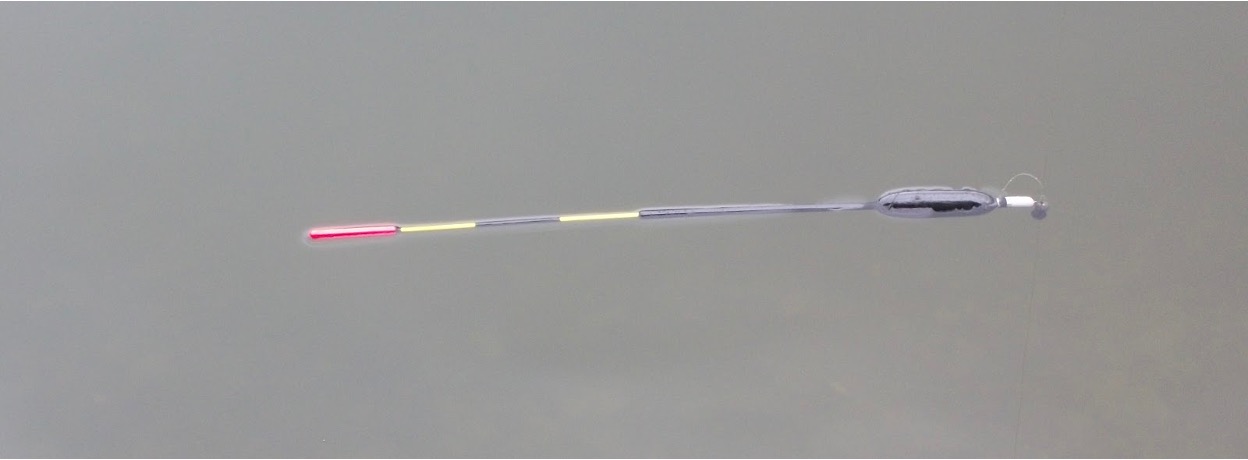
This float is partially loaded. Even so the loading is insufficient to cock the float so it will lie flat on the surface until the additional bulk has descended to the point where the slider-knot hits the float.
Creating a bulk.
When setting up at the actual water it is easier to use multiple AAA shot or BB shot than to experiment with different olivettes until you get just the right one. Set the bulk approximately three to four feet from the hook. Once you have applied approximately the right number of split shot to create the bulk, add one or two smaller shot as ‘trimmer’ shot, to make precisely sure that the body of the float is just under the water.
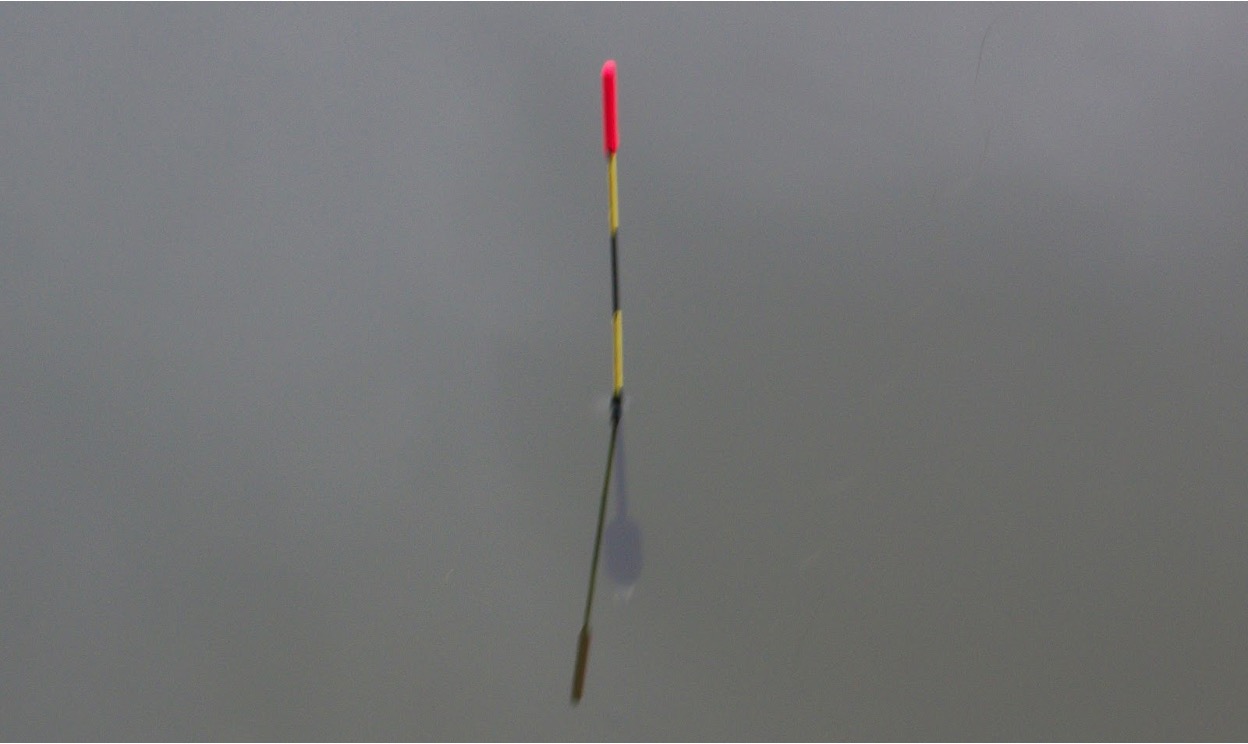
Once the bulk has registered on the float it will cock to approximately this point. All of the body has sunk and the heavier lower section is immersed too.
Dropper shot are important.
The dropper shots should be applied and spread out below the bulk. Do not be tempted to use too many multiple tiny shots because the dropper shots should each be big enough to sink the antenna by a discernible amount. They should also be exactly the same size. If you apply, let’s say, four droppers below your bulk, and the float does not sink to the tip, do not be tempted to add more and end up with five or six droppers. This would make each dropper have too little effect on the float.
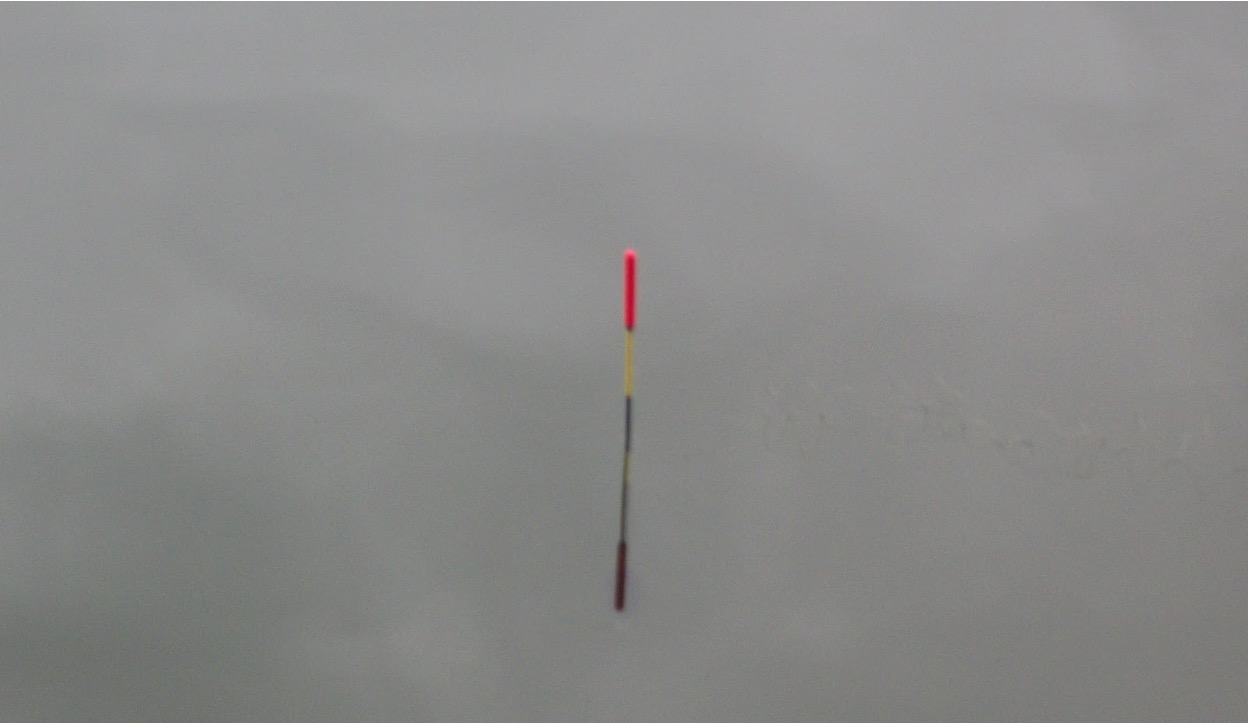
Compare this image to the previous one. The lower yellow section of the antenna has disappeared because the first dropper shot has registered on the float. It is not important to make a whole section of float disappear with each dropper but it is important to ensure that each dropper makes a discernible change to the way the float sits, and remember that you may be looking at this float at a distance of thirty metres, with a chop on the water, with eyes that have seen better days. This is why I try to shot my float so that the droppers will effect discernible sections of my antenna.
Every dropper should have an effect.
Much better to stick to four droppers and make each shot sink the float by a discernible amount, at least an inch or two. This means that even from a distance the angler should see each shot registering on the float as the antenna sinks in stages. If there are too many shots, too close together, the float will just sink steadily down to the tip whereas IT MUST sink in stages that the angler can read. Usually three dropper shot should suffice but it does depend upon the float. A float with a short antenna, or one with reduced buoyancy, may be ok with only two droppers.

Now the second dropper has registered and caused the black section of the antenna to disappear.
Ok. Why are these droppers so important?
I am not labouring the point about dropper shot because I want them to look good as the float settles, it is because the whole crux of the matter with a slider is that they MUST react correctly when a fish takes the bait. The bottom shot being lifted by a fish has to be small enough to give a discernible lift bite without being big enough for the fish to feel before it is too late.
Conversely, if there is a bite ‘on the drop’ having the droppers set up as I suggest will allow the angler to immediately discern that a fish has intercepted the bait. The angler should also be able to discern which dropper was the first to fail to register and if need be to shallow up slightly until the bait is consistently falling to the point where the fish want to feed.
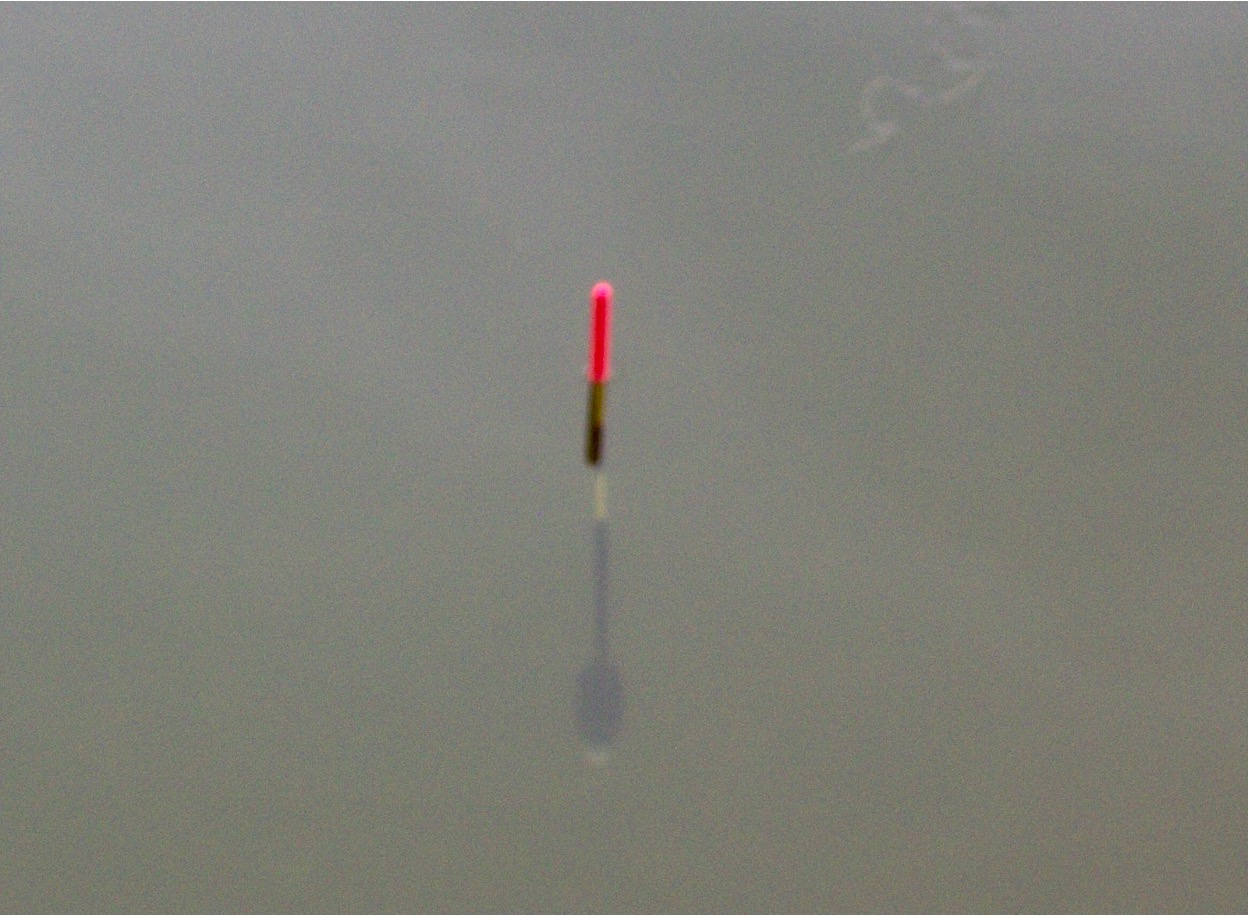
The float has now finally settled and all that is visible is the sight tip. If the angler feels that too much float is on show they can add an extra trimming shot to the BULK. It is important that you keep your dropper shots the same and do not add or subtract them. By trimming the bulk you will only alter the starting point from which the droppers take effect, but you will retain the nice individual stages that you will be able to read, and anticipate, as each dropper registers.
How to set the depth of your slider float.
It is important to realise that fishing a slider is primarily a method aimed at catching at full depth on the bottom. I generally fish with six inches or more of line on the deck and try to pin down my float to ensure that my bait is static. So, when I set up the depth on a slider I do not use a plummet. There is an element of personal choice here and if you prefer to try your ‘standard’ approach (as per all other float fishing techniques) then by all means go your own way. As with a lot of other angling methods there is not necessarily a right or a wrong way, …. just a way that works for you.
My method for setting the depth is as follows. First of all I don’t do it with a hooklength attached. I space out my dropper shots equally with the lowest one by the loop for attaching the hooklength. As previously mentioned, every shot must have an effect on the float so the bottom dropper is as good as a plummet.
Firstly I shallow up slightly and make sure that the float registers every shot in my chosen swim. Then I move my stop-knot up no more than six inches (i.e. I add no more than six inches of depth) and then I check to confirm that every shot is still registering. I keep on adding six inches of depth until I get no registration from the bottom shot. I will make several casts adjacent to my chosen area to make sure that the bottom is fairly even, and flat, and without any significant snags.
I will then take three inches off the depth and establish whether the bottom shot is still registering or not. If it is registering then I know the depth is no more than three inches more than I am set at. If it is not now registering I know that I am no more than three inches overdepth and I take another three inches off the depth to place that bottom shot just off bottom.
From this datum I know that my bottom shot is within an inch or so off bottom. Now, when I add my hook length I can fairly accurately set up so that I have exactly the amount of line on the deck as I want, usually about six inches. In a very strong tow I may set a foot or more of line on the deck and achieve this by either attaching a longer hooklength or far less often by sliding all my shot and bulk up the line to accommodate. Changing the hook length is far simpler.
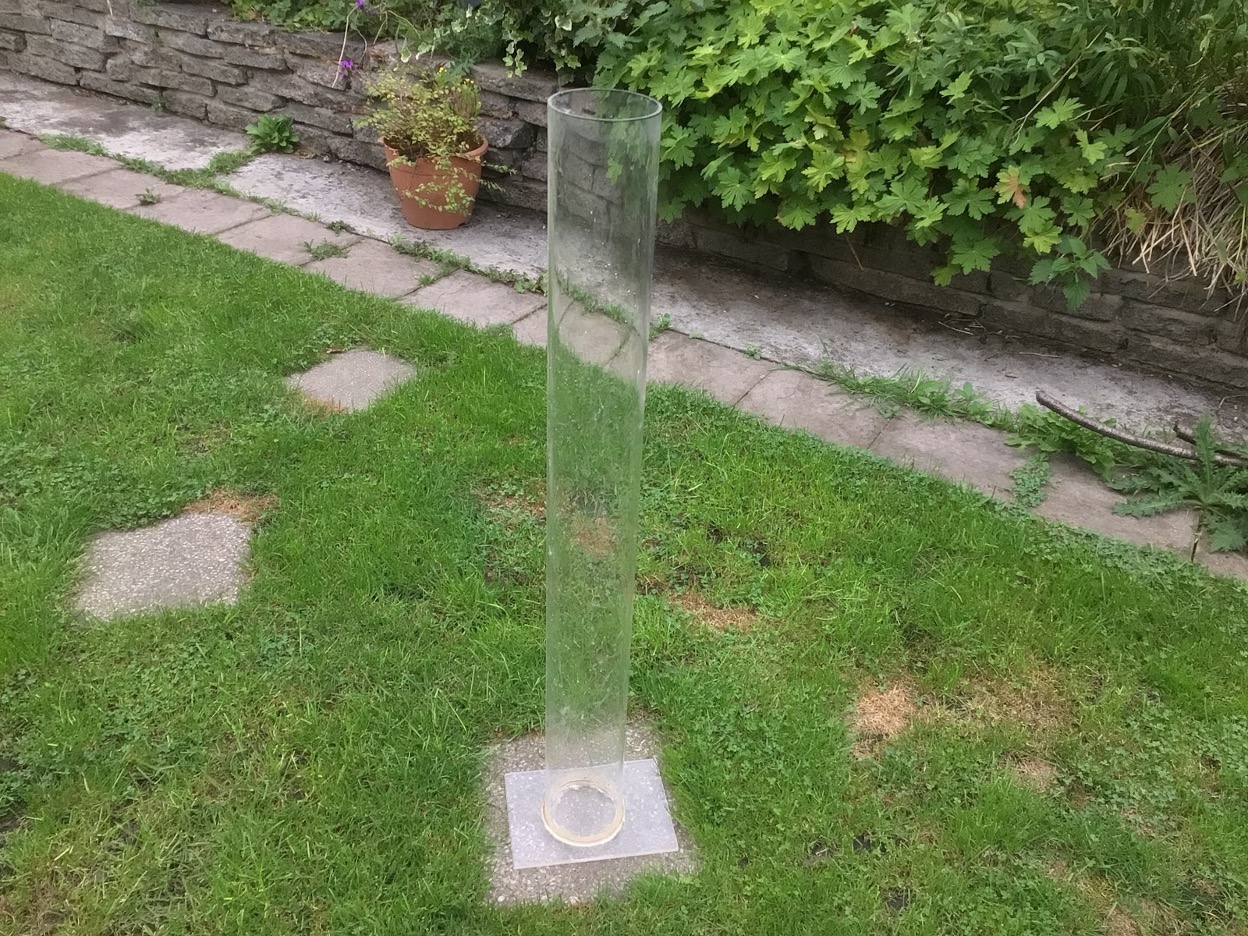
A float shotting tube can be an invaluable piece of kit for all types of fishing. Fill it up with water and it is easy to get the perfect shotting for any type of float. Especially useful for fine pole float rigs I also use mine for stick float rigs, especially those with a multitude of very small shot. Trying to apply twenty no8 and no10 styl leads on the bank is a trial I can do without. It is also absolutely perfect for determining the correct bulk for a slider float and equally invaluable in selecting the right size of shot to be used as droppers. This is the way to get the antenna to register in lovely visible and predictable steps. I made this shotting tube myself many years ago with materials purchased easily on-line, and it is one of the most useful, and often used, bits of kit I own.
How sensitive is the slider float?
Whilst purist anglers on the pole are concerned with placing a bait with pinpoint accuracy, and to precise depths, fishing with the slider doesn’t require the same level of attention. But don’t think that you are going to miss bite after bite because, though appearing to be very crude, a slider will surprise you with the frequency that you get unmissable bites, very often showing lift bites as opposed to the float going under. The fish takes the bait, lifts the line off bottom, and then lifts the lowest dropper shot. At this point your float starts to rise as the weight of the lowest shot is removed. I will remind you of what was stated earlier, “every shot must have a discernible effect on the float”.
When you are fishing with a Drennan Driftbeater, for example, just lifting one or two no10 shot will cause the carbon antenna to lift significantly out of the water. The fish is feeling virtually nothing and the angler is getting a tremendous indication that there is a fish on. Watching, and reacting to, a massive lift bite is without doubt one of angling’s high spots.
Conclusion
Fishing a slider is one of the most rewarding methods out there. There is no denying the satisfaction it can bring once the mystique is removed and the angler moves into confidently understanding all the subtleties required for success. Just the pleasure of consistently casting tangle free to exactly the same spot is rewarding enough, as is watching the float settle so predictably on every cast that it is sufficient to allow the angler recognise with absolute certainty that there has been a bite ‘on the drop.’
Finally it gives the opportunity of experiencing the most wonderful lift bites that only slider fishing can give. Slider fishing is a method that rewards at every opportunity. I really hope you give it a go because it is a little bit of hard work that will reward for the rest of your fishing life. Join the club, it’s addictive.
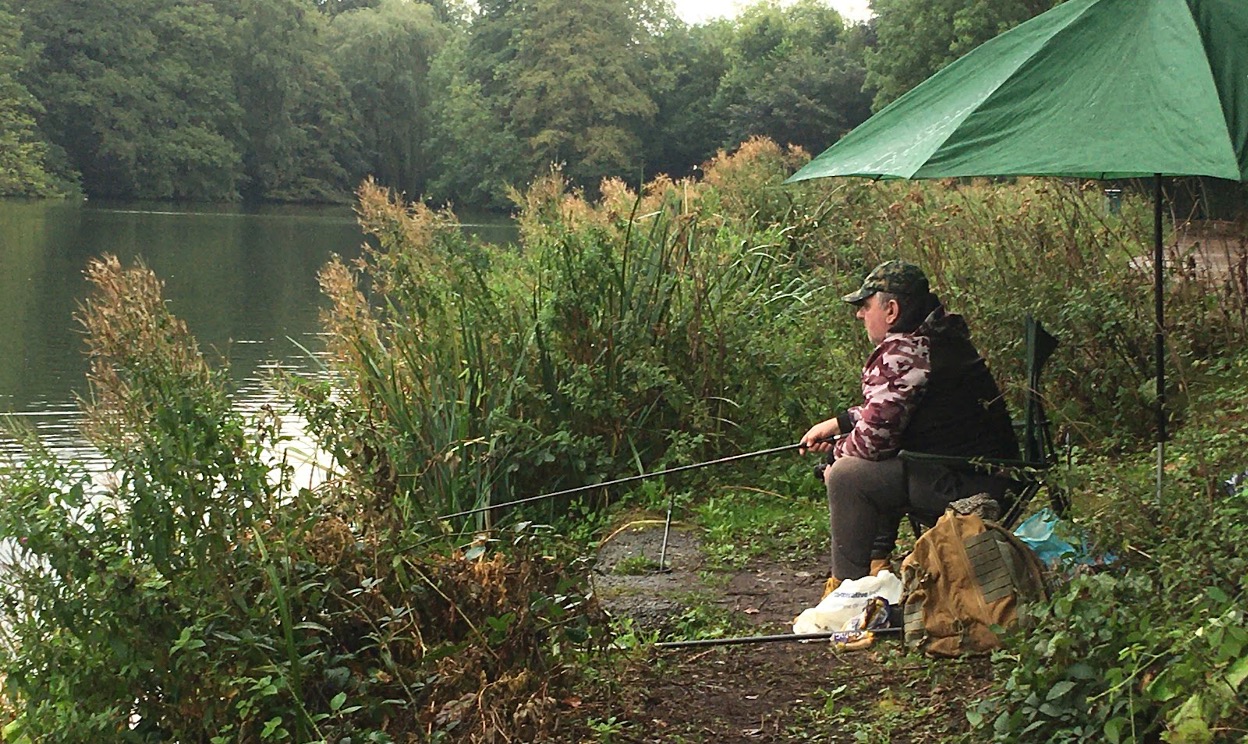
Look at this poor chap, he looks so glum doesn’t he? Could it be it’s because he hasn’t set up a slider and he has had to resort to using a feeder all day? Oh dear, where’s the fun in that? Everyone knows that float fishing is more fun. (Don’t worry folks, that’s my mate Simon and he will see the funny side, …. and he really should have used a slider. So, …. don’t be like my mate Simon. Use a slider.)
FAQs
Can you recommend venues to use the slider fishing?
Personally I would suggest giving it a try on any venue you like as it is good practice and fun. I will often try the slider on any depth over 8’ as, firstly, I always really enjoy it, secondly it alway aids casting by bringing all the weight to the bottom four feet of the line (really useful when there are a lot of trees around you), and finally I do it to keep on honing my skills for those days when I absolutely must use it on really deep water. That said I can recommend three deeper waters local to me that I think it will work on.
- Himley Great Pool in Dudley is 15’ deep on some pegs and on its day it is the best tench fishing in the area, all for the cost of a day ticket.
- Trimpley Reservoir nr Bewdley is 40’ deep in the middle and is full of smallish bream. There is a thriving club that manages the water.
- Finally, another deep reservoir, Snitterfield nr Stratford on Avon can be fished with Leamington AA membership and is absolutely stuffed with tench, crucians, bream and even some big carp.
What are the best floats to use for slider fishing?
Personally I think that for most of my applications unloaded floats are better than loaded ones. The exception to this is if you are fishing at very long range and then there is less choice of float. Many of the biggest floats in my arsenal are loaded and if I needed these very big floats I would not hesitate to use a loaded example. For people starting out with the slider I would simply recommend the Drennan Driftbeater floats. They are difficult to improve upon.
What is the maximum depth that can be fished with a slider?
Theoretically there is no limit. This is because you could potentially slide your sliding stop-knot up the line, and continue to do so, until you run out of line. In practice it would be very onerous to peel all your line off your spool to enable this to happen, and where is the water that is that deep anyway?
However, having discussed the ridiculous I must admit that there is often very deep water found when tackling a dam wall and to fish an area like this might require fishing at a depth of thirty or even forty feet.
My own personal record is fifty feet. I did this with a sliding stick float (homemade) on the river Shannon in Ireland. My homemade float had an eye affixed top and bottom and was originally a big fat balsa ‘chubber’ style float that carried five SSG shot. The stop knot was many layers under the surface of the line of the spool once I reeled in, and I recall having to occasionally peel the line off by hand as it caught on the stop-knot on the spool. Not for the faint hearted and not something I would do every day.
Never mind the maximum potential depth for slider fishing what depth do you recommend I target for my first ever time fishing the slider?
For the first time slider angler I would recommend they try water that is no deeper than fifteen or sixteen feet deep. Essentially I would not recommend that the first time angler picks a swim that requires the sliding knot to be on the reel during the cast.
You mentioned two main shotting patterns, i.e. OFF the bulk and ON the bulk. What’s the difference?
A LOADED float should ALWAYS be set up with the float actually resting on the bulk. This is because any separation between these two major weights will cause them to ‘fight’ each other in mid-air on the cast. They can rotate around each other in flight and will act like a pair of bolas, ending up in the mother of all tangles. The one disadvantage to resting the float on the bulk is that the bulk can come into heavy and constant contact with the body of your float, causing damage. Some handmade slider floats are relatively expensive and Drennan Driftbeaters ain’t cheap either so I prefer to avoid this if I can. Cracked paint on the body of a float can cause it to soak up water, affecting its buoyancy, and changing how it performs. Oh, … and I’m tight!
An UNLOADED float gives you the option to fish either ON the bulk or OFF the bulk. The choice is yours. To keep the float OFF the bulk just use one or two rubber float stops up the line from the bulk. Ensure the rubber float stops are far enough above the bulk so that no part of the float can contact the bulk.
Comments
Leave a Reply
You must be logged in to post a comment.
4 thoughts on “Fishing using a sliding float”
Similar articles

In Memory of Peter Cliff
It is with heavy hearts that we announce the passing of Peter Cliff, the founder of Fisheries.co.uk, who passed away in May 2025. Peter’s vision and dedication transformed what began as an idea 26 years ago into one of the…
River Fishing – A guide to getting started
Are you thinking of going for a trip to the river in 2025 but find yourself filled with trepidation because you have never fished running water before? Well I want you to relax. Let us take the mysteries out of…
A guide to fishing licences in 2025
Whether you want to become a new angler or you’ve been fishing for years, you will be required to obtain the Environment Agency Rod Licence. In this article we explain what you’ll need if you want to go fishing in…
Make the most of the 2025 river season with this in-depth guide to fishing rivers
If you’re new to fishing rivers, or just fancy a change from fishing stillwaters, this guide will help you make the most of the new 2025 river fishing season. With advice on reading the water, what species to fish for…
Our guide to fishing this spring (2025)
With the worst of the weather over (we hope!) and with spring finally here, it’s time to clean out that tackle box and get on the bank for some spring time fishing.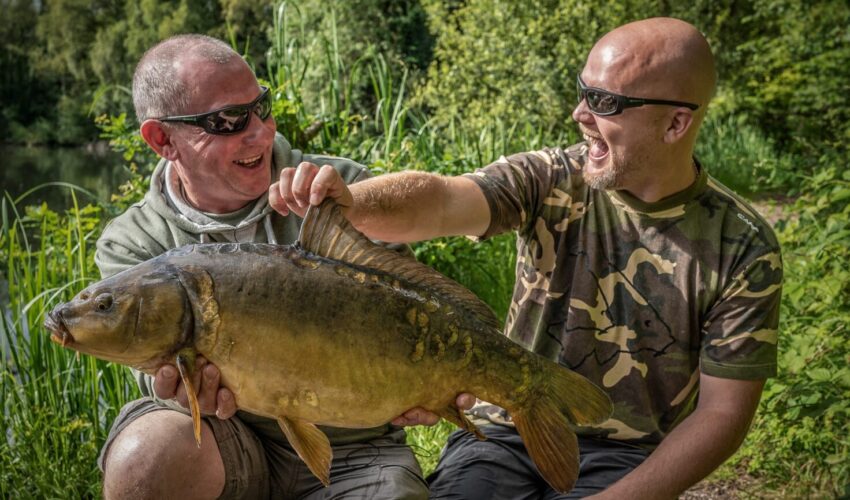
Take a friend fishing
Get ready to hit the water! From April 18th to May 4th, 2025, you can get a free fishing license to take a buddy out and show them what fishing’s all about. Yep, free! It’s all part of the “Take…Search by Region or County
Find new places to go fishing in your local area or county by choosing your destination below


Keith
Why all that faffing about buy some frixon floats finds depth all on its own saves so much time
Hi there,
I am sure you are correct. Sorry that the fine art of slider fishing isn’t for you.
need a clarification.
So to clarify, are the dropper leads just above the bottom, or resting on the bottom?
Hi there,
sorry for the tardy response.
You have asked a very important question that really goes deeper into all types of fishing, not just slider fishing. Because I didn’t want to overcomplicate my article I stopped short of explaining these matters more fully. However, because you asked, here goes.
The principle with slider fishing is that EVERY shot has a reaction on the float. If your bottom dropper shot is touching bottom it won’t register on the float so your float will sit higher in the water. Without any adverse conditions, on a nice still day, you should keep all your shot off the deck. With the bottom shot almost resting on the bottom.
If you need to anchor your rig slightly, because there is a slight tow, you can trail several inches of hook length on the bottom, especially if it brings you more bites. The extra line on the bottom will ‘anchor’ your float and the effect may even pull the tip down slightly. As soon as the fish lifts your bait it will remove the anchor and because it shifts your bottom shot it will be indicated on your float. It may only be a slight lift but you should still react.
More adverse conditions may require something additional, however, and putting a shot firmly on the deck is a good way to anchor your rig so that it does not get moved by wind or tow. However, if wind or tow are too strong, one shot may not be effective enough and your float may still drift from over your baited area. To compensate for this you may need to put the bottom two or even three shot on the deck. This is where having a few droppers is better than having just one. If it takes three foot of line, and three spread droppers lying on the deck, just to anchor your float, be not afraid. It stands to reason that if a fish moves any of those shot there will be a reaction on the float. If nothing happens on the float you didn’t need three shot to anchor your float in the first place.
If the tow causes your float to be pulled lower in the water, no matter how many shot are on the deck, but the effect is still not strong enough to actually sink your float, then a balance point will have been reached. This is perfect, and you can continue to fish like this until conditions change.
Keep varying the number of shot, along with the length of line on the deck to match the requirements of the tow.
This may seem crude but it still meets the criterion that every shot is still having a discernible effect on the float. If a fish dislodges the anchor shots, no matter how many there are, the float will invariably shoot up to clearly indicate the bite.
The skill is in understanding the purpose of each of your dropper shot and ‘reading’ the movement of the float. I realise that this may not be easy for some anglers, and practice and experience helps enormously. Indeed, for me, getting a big, crude looking, slider float to show me beautifully exaggerated bites in tough conditions is one of the pinnacles of the art.
I hope this has answered your question sufficiently. Truth is if we sat down over a cup of tea and discussed this I could probably go on for hours. Certainly I would talk too long for me to be able to write it all down here.
Thanks for taking an interest in my article,
Chris