How to get your tackle in order this Spring
Does your garage look like a bomb went off in a tackle shop? Perhaps you’re wondering when should you replace fishing line, refresh your rigs or how to fix a broken rod tip? Well, now is the time to tidy up! Dom Garnett is your guide to getting your tackle den in order, item by item.
Anglers are messy beasts at the best of times. Sure, we start with good intentions. At least, before we get home late, cold and wet, and just chuck everything in a corner. Before you know it, there’s stale bait, coiled line and the start of anarchy.
Now, I don’t want to sound like your mum here, but if you’re like most of the anglers I know it’s probably time to roll your sleeves up. Because while you’d rather be fishing, getting your kit in order is sure to free up more bank time later, not to mention saving you hassle and money. I speak here not as some annoying tidy freak, but a rushed and sometimes absent-minded angler.
So, where do we start? Well, the sensible way is item by item. That way, you can skip right to the bits that apply to you. That said, we’ll also include a useful checklist of further tips at the end- including advice that could save you a small fortune. Time to get tidying!
Fishing Line: How to store it and when to replace it!

Fishing line is always best stored in the dark: a black bag or stocking is ideal.
Why start with fishing line? Mainly because this is the item most likely to cause a right mess or lose you the fish of the season. But the thing with line is that because it’s not as sexy as rods and reels, it gets overlooked.
First of all, you might ask: how long can I keep fishing line? When exactly does fishing line need replacing? There is no set answer, but the more you use it, the worse it will get. A good tip for any fishing trip is to inspect the last few yards- and if in any doubt, cut off those last two or three feet of worn out line and start fresh.
Light and regular hammer are the big killers here. With regular use, however, I would seldom use even good quality mono much more than a year. If in any doubt, treat yourself to new line! Braid will last much longer, it must be said, at least until you manage to tangle or damage it.
Another common question is: Does fishing line have a use by date or lifespan? Unused and stored in the dark, regular fishing line should last for several years. Braided line should last even longer, as it is not light sensitive in the same way, although it should also be stored in a dry, safe place.
Number one tip for all fishing line: Store it in a dark place, where direct light won’t age or weaken it! A black stocking or bag is ideal for keeping spools safe. Never buy old line either- and beware any shop that keeps its fishing line in a sunny part of the store!
Fishing Rods

Whether you buy it or make your own, a rod rack is a must for your tackle corner.
What is it with anglers and their rods? Some are ridiculously careful, taking better care of their latest carp or feeder rod than their kids or car. Their prized weapons get cleaned every trip and they even leave the original shrink-wrap on (not a great idea, as this can trap moisture and rot the handle). Meanwhile, other anglers treat rods in a manner bordering on abuse.
While you don’t have to get silly about rods, there are some sensible steps anyone can take. First up, a rod rack is the best thing you’ll ever invest in to stop blanks getting trodden on or smashed! Either treat yourself to one, or make one. This can easily be done with a piece of wood and either some bits of brush or little sections of hose pipe, split on one side, to act as mini grips.
As for other basic fishing rod maintenance, it’s handles and tip rings that take most wear and tear. With handles, grubby hands and hooks can both take their toll. One preventative measure here is to keep an old towel handy when fishing, so that this takes the dirt rather than your rod handle! Another good shout is to clean your rod periodically with a sponge scourer and a little water and detergent.
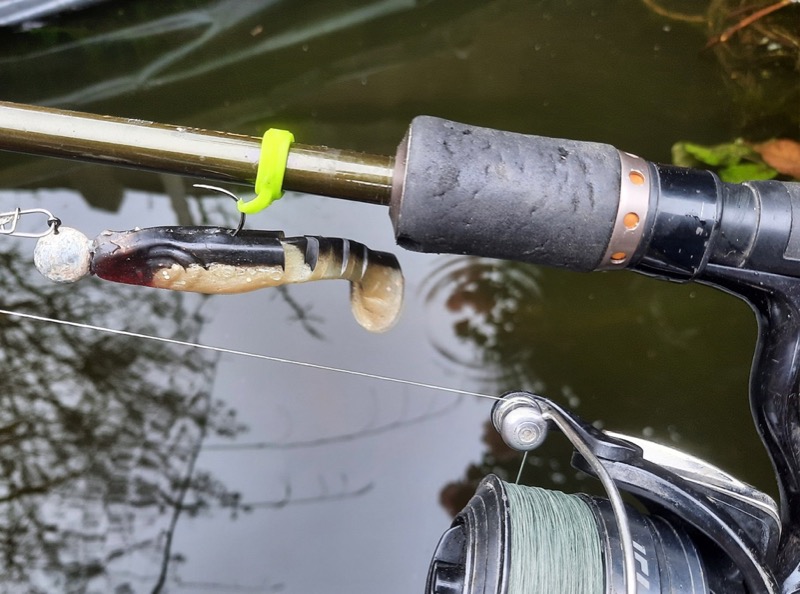
On predator and lure rods, add a hook keeper if there isn’t one.
With predator rods or any rods that are used with big hooks, another good tip is to add a hook keeper if there isn’t one. I simply stretch on a pole angler’s “hook up” to rods lacking this feature (above) – a minor detail, but it’s amazing how much damage things like treble hooks do to rod handles.
If things get really drastic with worn handles, however, you can also lightly sand down the cork. You only want to take a millimetre off- but you’ll end up with lovely clean, smooth finish (also ideal if you want to sell a rod!).
How to repair the tip ring on a fishing rod
Most of the time when you break a rod, it’s the tip that snaps because this is the thinnest, weakest point. Replacing this is fairly easy, however, provided the carbon hasn’t broken too far towards the second ring.
Here’s a very simple guide:
- Take the broken rod end and very gently sand it smooth. You may have to trim down with a fine saw if there is any splintered carbon or rough edges. Go as far as needed to remove any splits, which will create weak spots.
- To get the existing tip ring off the broken rod section, heat steadily with a lighter until the adhesive melts. You can then simply pull the tip ring off. You may well need pliers and a glove of some kind for handling the parts without burning your hands!
- If you’ve only lost an inch or so of tip, you may be able to pop the original tip ring straight back on. However, if the rod tip has broken further down, it’s likely it will be too thick for the original part. You might try sanding the carbon down a little to make it slimmer– but you mustn’t make it too thin or it’ll be weak.If the end of the rod you’re left with is too thick, you’ll need to take the broken tip to a tackle shop and try different tip rings to find a snug fit. You could also carefully measure the thickness and order online- but being able to test a new tip ring in a real shop is much better. Plus, we all want to support our local tackle shop instead of tax dodging billionaires, right?
- Now apply a thin layer of two-part epoxy or another suitable glue to your sanded down rod end, before carefully adding the tip ring. To make sure everything is lined up dead straight, try holding the rod top away from you and looking “down the rings” as if you’re looking down a gun sight. Job done!
Fishing Reels
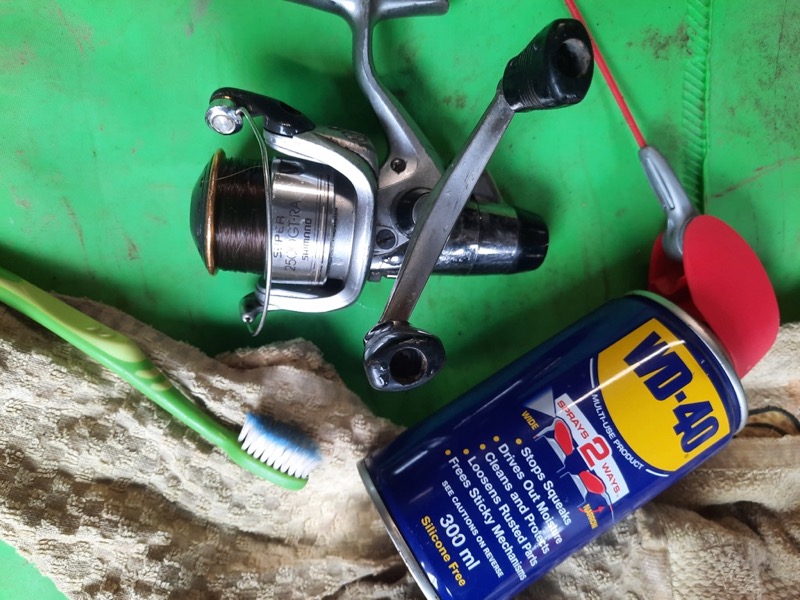
A cotton bud or old toothbrush is a good way to get into the crevices and hard to reach bits.
While anyone can give their reels some TLC, a quick word of warning here: most anglers would be silly to take one apart! If the issue is anything fine or fiddly, you’re likely to create more issues than you solve. Hence, for all major repairs you’ll want to find your local reel and tackle repair guy (a few do still exist!) or see if the maker provides any reel servicing.
However, even for the angler who doesn’t want an oily 78-piece jigsaw to complete, a bit of reel maintenance is easy. Start by taking the spool off and giving everything a bit of a clean. Quite often, when the spool “checks” or stutters it’s not because of a technical issue, but dirt or grit.
A cotton bud or old toothbrush is a good way to get into the crevices and hard to reach bits. Otherwise, a cloth will suffice. Should the reel be less than smooth, you can also apply a touch of WD40. Especially to the spindle (for non reel nerds, that’s the central stick thingy that the spool goes up and down on).
Tackle Boxes and Storage
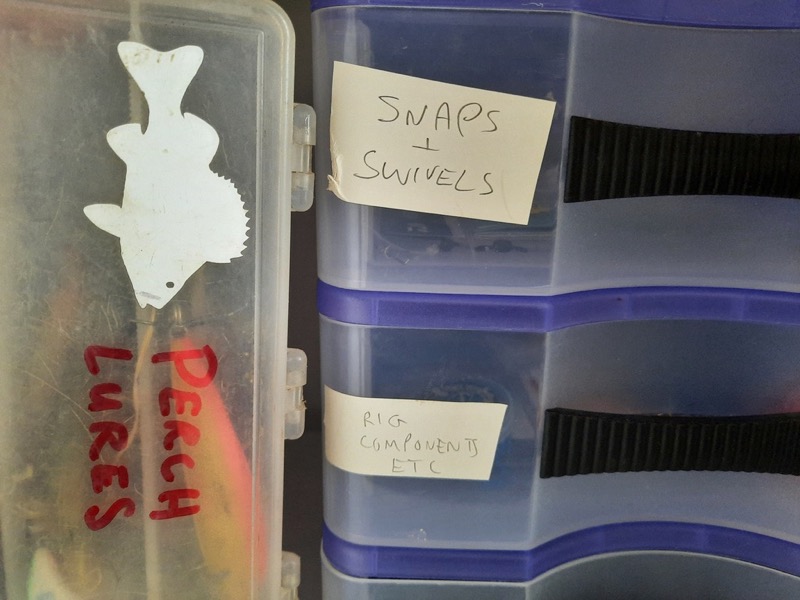
Store your kit in separate themed boxes, so one for lures, another for feeder fishing etc.
Where do I even start with tackle boxes? Most of us begin with something tidy, before they become dumping grounds. The only solution is to get organised and stay that way- and that means spending a bit of time at the end of each session as well as the start.
One brilliant way to really sort things out is to have “themed” and labelled storage, so you can stop mixing up lures, floats and other items. Once order starts to return, make life easier by getting some sticky labels and a marker pen! For instance, keep all your feeder fishing stuff, carp leads and floats all in their own boxes.
Another must for storage is a selection of plastic drawer units and toolboxes. You can pick these up cheaply at boot sales, online free-cycle sites and the rest. Again, label and store your gear with care! Yes, it’s a dull job, but this way you won’t be chasing round for hours when all you want is a packet of size ten hooks or the right waggler- and your kit will be safe and dry. I’m not your mum or other half, but they would definitely approve!
Lures and Flies
These items are another graveyard in so many garages and man-caves. Tragic, when you see how much a lot of them cost! Storage and maintenance are simple enough, though.

Now, that’s better!
First up, go through your collection and be honest- which lures or flies are still in good nick? Do some need some TLC or the bin? With flies, discard any rusty hooks right away. With lures, be sure to replace old or suspect metalware – after all, crap hooks could cost you the fish of the season! Get them off the split rings and replace with newer models. These days, I tend to bin trebles and use special replacement singles- much better for the fish as well as better at avoiding that situation where you pick up one plug and twenty others come with it!

The choice is simple with older lures and flies: Sharpen your hooks or lose fish!
If your flies or lures look fine but have been used a fair bit, another essential job is to sharpen the hooks every so often. Buy a hook sharpener and touch them up! A simple test with hooks is to run a point across your thumbnail. If it doesn’t leave a little scratch line with minimal effort, it’s not sharp enough!
Fishing Bait Storage
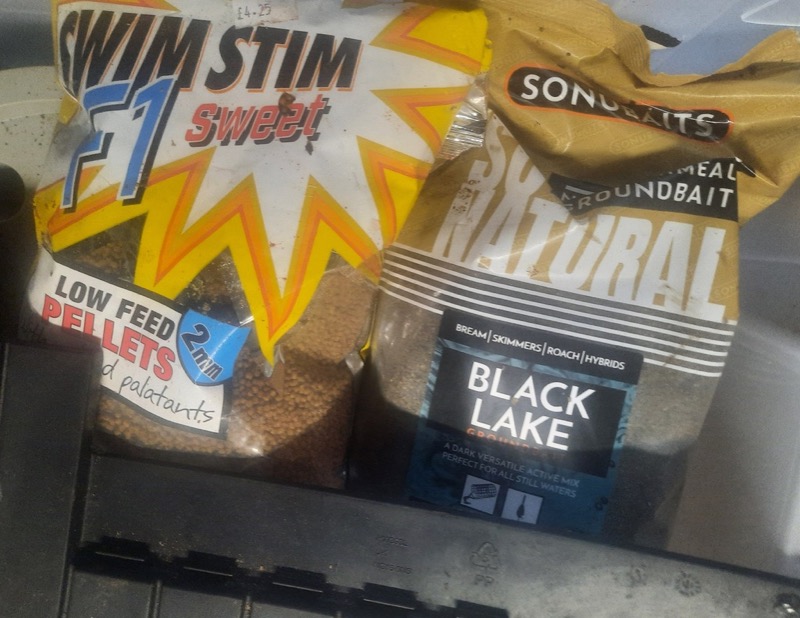
For pellets, make sure you store them in a sealed box to prevent unwanted visitors.
Of course, besides rods, lines and other stuff, bait is another key consideration for most anglers. It’s also an area that brings its own perils, whether it’s bait going off or getting raided by pests!
A second hand fridge freezer is a godsend for the garage- and these can often be picked up cheap. Failing that, though, things like boilies, pellets and groundbaits still need careful storage. For most of us, this means plastic crates and boxes with secure lids that are moth and rodent proof. Get into the habit of putting things away- and writing dates on packets when you make bait or buy it!
How long does fishing bait such as pellets and boilies last? The lifespan of different baits varies a lot, it must be said. After around a year, most pellets, boilies and groundbaits are still reasonable, but they will start to lose their appeal somewhat. At around two years, they are a bit like old kitchen spices- still edible but nothing like as potent as they were!
The moral is simple: use bait up as soon as you can and don’t overstock. And if it’s getting a bit old, put it to the front of the queue- or perhaps even consider adding some extra flavour to revitalise it a little. In my own fishing, I’d use slightly older bait for pleasure fishing, but never for a match or special trip! Leftover groundbait and pellets can also be frozen rather than chucked- although this will change the consistency.
Final tackle tidy up tips
Ok, so with a bit of luck and elbow grease, hopefully your tackle and bait will be in better order this season. However, there are some other quick things well worth mentioning before we get back to the more appealing topic of fishing.
Granted, it’s rather a chore to care for your stuff. But hey, it’s a nice feeling to get things tidy and to know where everything is again. Besides, you just know it will help you to enjoy your hobby more and catch more fish in the long run!
A few final tips:
- Take care when securing your tackle in a shed or garage. Make sure nothing is on display and that you have a decent lock! A CCTV camera is another good idea- even if it’s just a dummy model to put thieves off!
- Also the topic of safety, do check your insurance covers your gear and outbuildings. It’s also worth making a quick list of what you own (just don’t show the wife) and a rough value, just in case.
- Storage and safety also apply when you’re away from home! One great tip for anyone who leaves tackle in a car or van is to keep an old blanket handy. This can easily be used to conceal your precious gear.
- Avoid wet kit at all costs! At the end of a rainy trip, you simply must dry out all your kit, the next day at very latest. Moisture getting inside hook packets and other metal items is especially deadly- and a good tip is to save little “dessicant” or moisture absorbing packets (like the sort that come with electrical goods or covid tests!) to place in your tackle boxes to get rid of any damp.
- Mice and rodents can be a horror story for any outdoor storage. If they’re an issue in your area, you may well want to store nets securely, under at least one solid layer. For dry or bulk baits, a metal bin with a fitted lid is the best option of all- mice will chew almost anything, but they don’t like metal. Wire wool can be used to block holes and entry points.
- Most anglers start their day tidily- it’s packing up where the damage is done! Get into the habit of slowing down and tackling down with as much care as you tackle up.
Similar articles

River Fishing – A guide to getting started
Are you thinking of going for a trip to the river in 2025 but find yourself filled with trepidation because you have never fished running water before? Well I want you to relax. Let us take the mysteries out of…
A guide to fishing licences in 2025
Whether you want to become a new angler or you’ve been fishing for years, you will be required to obtain the Environment Agency Rod Licence. In this article we explain what you’ll need if you want to go fishing in…
Make the most of the 2025 river season with this in-depth guide to fishing rivers
If you’re new to fishing rivers, or just fancy a change from fishing stillwaters, this guide will help you make the most of the new 2025 river fishing season. With advice on reading the water, what species to fish for…
Our guide to fishing this spring (2025)
With the worst of the weather over (we hope!) and with spring finally here, it’s time to clean out that tackle box and get on the bank for some spring time fishing.
Take a friend fishing
Get ready to hit the water! From April 18th to May 4th, 2025, you can get a free fishing license to take a buddy out and show them what fishing’s all about. Yep, free! It’s all part of the “Take…
Fishing tips for hard days: How to get more bites
It happens to the best of anglers. Whether conditions are tough, the fish are moody, or our plans simply aren’t working, there are days we struggle. But what can you do to catch fish that seem unwilling to cooperate? There’s…Search by Region or County
Find new places to go fishing in your local area or county by choosing your destination below


Comments